Large Outdoor Radio Controlled Clock Manual: A Comprehensive Guide
This manual provides comprehensive information on the installation, operation, and maintenance of a large outdoor radio-controlled clock. These clocks offer accurate timekeeping by synchronizing with a radio time signal, typically emitted by a national standards authority. This eliminates the need for manual adjustments, even across daylight saving time transitions. The rugged construction and large display size make them ideal for schools, industrial facilities, public buildings, and other outdoor environments where accurate and easily visible time is critical.
Before proceeding with installation or operation, carefully review this manual in its entirety. Failure to follow the instructions may result in improper clock function or damage. This manual covers key aspects including mounting, signal reception, power requirements, and troubleshooting common issues.
Key Point 1: Installation and Mounting
Proper mounting is crucial for the longevity and accuracy of an outdoor clock. The clock's mounting location should be chosen carefully, considering both visibility and accessibility for maintenance. The selected location should also offer sufficient structural support to bear the clock's weight and withstand environmental factors such as wind and rain.
The first step in installation is to identify a suitable mounting surface. This surface must be solid and capable of supporting the clock's weight, especially in adverse weather conditions. Options may include a building wall, a freestanding pole specifically designed for the purpose, or an existing structure. When mounting to a building wall, it is critical to use appropriate wall anchors that are compatible with the wall's material (e.g., brick, concrete, wood). Ensure the anchors are rated for the clock's weight plus a safety margin.
For pole mounting, a sturdy pole with a diameter suitable for the clock's mounting bracket is required. The pole should be securely anchored to the ground, ideally using a concrete foundation. The depth and dimensions of the foundation will depend on local soil conditions and wind load considerations. Professional installation is recommended for pole mounting, especially in areas prone to strong winds.
The clock should be mounted in a location that provides optimal visibility from the intended viewing area. Consider factors such as sunlight glare and obstructions (e.g., trees, buildings) when selecting the mounting height and orientation. Generally, a higher mounting position will provide better visibility. However, accessibility for maintenance should also be considered.
Most outdoor clocks come with a mounting bracket that is designed to attach to the selected mounting surface. Follow the manufacturer's instructions carefully when attaching the bracket. Use appropriate hardware (e.g., bolts, screws, washers) that are made of corrosion-resistant materials, such as stainless steel. Tighten all hardware securely to prevent the clock from shifting or falling. After mounting the bracket, carefully attach the clock to the bracket. Ensure the clock is properly aligned and secured before releasing it.
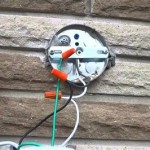
During installation, it's essential to ensure that the clock's antenna is positioned for optimal reception of the radio time signal. Avoid mounting the clock in locations where the signal may be blocked or interfered with by metal objects, tall buildings, or electronic equipment. Follow the manufacturer's recommendations regarding antenna orientation and placement.
Once the clock is mounted, verify that it is level and securely attached. If necessary, make adjustments to the mounting bracket to ensure proper alignment. Also, check that all wiring connections are secure and protected from the elements.
Key Point 2: Radio Signal Reception and Synchronization
The accuracy of a radio-controlled clock depends on its ability to receive and synchronize with a radio time signal. These signals are typically transmitted by national standards authorities, such as the National Institute of Standards and Technology (NIST) in the United States, the Physikalisch-Technische Bundesanstalt (PTB) in Germany, and others. The signals contain highly accurate time information that the clock uses to automatically set and maintain the correct time.
The strength and reliability of the radio signal can vary depending on several factors, including the clock's location, the distance from the transmitter, and environmental conditions. Buildings, terrain, and atmospheric disturbances can all affect signal reception. Metal structures, in particular, can significantly interfere with radio signals.
To optimize signal reception, the clock should be mounted in a location that is free from obstructions and interference. Avoid mounting the clock near metal objects, such as metal walls, roofs, and large electrical equipment. A clear line of sight to the horizon can improve signal reception, but this is not always necessary. The clock's antenna should be oriented according to the manufacturer's instructions. Some clocks have an internal antenna, while others have an external antenna that can be positioned for optimal reception.
Most radio-controlled clocks will automatically attempt to synchronize with the radio time signal at regular intervals, typically once or twice per day. The synchronization process may take several minutes to complete. During this time, the clock may display a searching or synchronizing message. Once the synchronization is successful, the clock will display the correct time. If the clock is unable to synchronize with the radio time signal, it may continue to operate using its internal oscillator, but its accuracy will gradually drift over time.
If the clock is consistently unable to receive the radio time signal, there are several troubleshooting steps that can be taken. First, verify that the clock is located within the coverage area of the radio transmitter. Coverage maps are often available on the transmitter's website. Second, try relocating the clock to a different location, preferably one with a clearer line of sight to the horizon. Third, check the clock's antenna connection and orientation. Ensure that the antenna is securely connected and properly positioned. Fourth, check for sources of interference, such as metal objects or electronic equipment, that may be blocking the signal. Finally, try resetting the clock and allowing it to attempt synchronization again.
In some cases, a signal amplifier may be used to boost the radio signal strength. These amplifiers are typically designed to be used with specific types of radio-controlled clocks. Follow the manufacturer's instructions carefully when installing and using a signal amplifier. In areas with very weak or unreliable radio signals, an alternative time synchronization method, such as GPS or network time protocol (NTP), may be used. These methods require a separate receiver or network connection.
Key Point 3: Power Requirements and Maintenance
Outdoor radio-controlled clocks typically require a reliable power source to operate. The specific power requirements will vary depending on the clock's design and features. Most clocks operate on either AC power (120V or 240V) or DC power (e.g., 12V or 24V). Some clocks may also have a battery backup to maintain timekeeping during power outages. It's crucial to adhere to the manufacturer's specified power requirements to prevent damage to the clock or create a safety hazard.
For AC-powered clocks, ensure that the power supply is properly grounded and protected from surges and overloads. Use a surge protector to safeguard the clock from damage caused by power spikes. The power cord should be suitable for outdoor use and properly sealed to prevent moisture ingress. When connecting the clock to the power supply, follow all applicable electrical codes and regulations. If you are not comfortable working with electrical wiring, consult a qualified electrician.
DC-powered clocks typically require a separate power adapter to convert AC power to the required DC voltage. The power adapter should be rated for outdoor use and protected from the elements. Ensure that the polarity of the DC connection is correct before connecting the clock to the power adapter. Incorrect polarity can damage the clock.
If the clock has a battery backup, the battery should be replaced periodically to ensure reliable timekeeping during power outages. The battery type and replacement interval will be specified in the clock's manual. Use only the recommended battery type and follow the manufacturer's instructions for battery replacement. Dispose of used batteries properly, according to local regulations.
Regular maintenance is essential to ensure the longevity and proper functioning of an outdoor clock. The clock should be inspected periodically for signs of damage, such as cracks, leaks, or corrosion. Clean the clock's display and housing regularly with a soft, damp cloth. Avoid using abrasive cleaners or solvents, as these can damage the clock's finish. If the clock is exposed to harsh weather conditions, it may be necessary to clean it more frequently.
Check the clock's mounting hardware periodically to ensure that it is still secure. Tighten any loose bolts or screws. Inspect the clock's wiring connections for signs of corrosion or damage. Replace any damaged wiring or connectors. If the clock has an external antenna, check the antenna connection and orientation. Ensure that the antenna is securely connected and properly positioned.
If the clock is not functioning properly, consult the troubleshooting section of the manual for possible solutions. If you are unable to resolve the problem, contact the manufacturer or a qualified technician for assistance. Do not attempt to repair the clock yourself, as this may void the warranty and could create a safety hazard. When seeking assistance, provide the clock's model number, serial number, and a detailed description of the problem.
Proper care and maintenance will help to ensure that the outdoor radio-controlled clock provides accurate and reliable timekeeping for many years.

Marathon Cl030066 Series Clock User Manual Manualslib

18 Inch Atomic Metal Outdoor Clock With Thermometer

Radio Controlled Og Clock Instructions The Depot

Radio Control Large Lcd Digital Og Style Wall Clock Youshiko

How To Set Time Marathon Atomic Clock With Indoor Outdoor Temperature Zone Fix

Radio Controlled Wall Clock Black

How To Set An Atomic Wall Clock Hunker

Atomic Radio Controlled Clock Lee Valley Tools

Buy Perfect Time Radio Controlled Outdoor Garden Clock About Delivery By Primrose

Giant Radio Controlled Clock Led Display Wood Effect Frame
Related Posts