Building an Outdoor Kitchen Using Metal Studs: A Comprehensive Guide
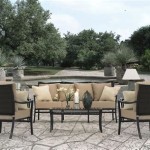
The allure of an outdoor kitchen is undeniable. It transforms a backyard into an entertainment hub, expanding living space and providing a comfortable environment for cooking and socializing. While traditional outdoor kitchens often involve wood framing or masonry, employing metal studs offers a viable and increasingly popular alternative. This construction method provides durability, resistance to the elements, and a streamlined building process, making it an attractive option for both DIY enthusiasts and professional builders.
This article explores the advantages of using metal studs for outdoor kitchen construction, details the materials and tools required, and provides a step-by-step guide to building a robust and aesthetically pleasing outdoor cooking space.
The initial step in any construction project is planning and design. For an outdoor kitchen, this involves considering factors such as the available space, desired appliances, and overall layout. A well-thought-out design will not only ensure the kitchen functions efficiently but also complements the existing landscaping and architecture of the property.
Before beginning construction, it is crucial to obtain any necessary permits from the local building authorities. Regulations vary depending on location, and it is essential to comply with all applicable codes to avoid potential issues. This may involve submitting detailed plans and specifications for approval.
Key Point 1: Advantages of Using Metal Studs
Metal studs provide several advantages over traditional building materials for outdoor kitchen construction. These benefits contribute to the longevity, safety, and ease of construction of the outdoor kitchen.
One of the primary advantages is their resistance to rot and pests. Unlike wood, metal studs are not susceptible to decay caused by moisture or insect infestation. This is particularly important in outdoor environments where exposure to the elements is unavoidable, leading to reduced maintenance and a longer lifespan for the structure.
Furthermore, metal studs are inherently non-combustible. This provides a significant safety advantage, especially in an area where open flames and high temperatures are common. Using metal studs minimizes the risk of fire and contributes to a safer cooking environment. This is not to say that areas directly near the grill will not need fireproof insulation, simply that the framing material itself is non-combustible.
Metal studs are also lightweight and easy to handle. This simplifies the construction process, making it easier to assemble the frame and maneuver materials on-site. The uniform dimensions of metal studs also contribute to a more precise and efficient building process.
Finally, metal studs are often a more cost-effective option compared to lumber, especially considering the rising prices of wood and the need for pressure-treated materials for outdoor use. The reduced maintenance requirements of metal framing also contribute to long-term cost savings.
Materials and Tools Required
A successful outdoor kitchen project using metal studs requires a specific set of materials and tools. Selecting quality materials and having the appropriate tools on hand will streamline the construction process and ensure a professional finish.
The primary material is, of course, metal studs. These are typically available in various gauges and lengths, and the selection should be based on the structural requirements of the kitchen. Thicker gauges offer greater strength and are suitable for load-bearing applications. Track, which secures the studs at the top and bottom, is also essential.
Screws designed specifically for metal framing are needed to assemble the structure. These screws are self-tapping and provide a secure connection between the studs and track. Consider using rust-resistant options for outdoor applications.
Cement board is typically used as the sheathing material over the metal frame. This provides a durable and water-resistant surface for tiling or other finishes. Cement board is also fire-resistant, adding an extra layer of safety to the outdoor kitchen.
For insulation, use a type appropriate for outdoor use. Mineral wool or a closed-cell spray foam are good choices as they resist moisture and provide thermal insulation. Insulation is crucial for protecting appliances and plumbing from freezing temperatures in colder climates.
Depending on the design, additional materials such as flashing, weather stripping, and sealant may be needed to ensure a watertight and weatherproof structure. These materials help prevent water intrusion and protect the metal frame from corrosion.
Essential tools include metal snips, a drill with screw-driving attachments, a level, a measuring tape, a square, safety glasses, and gloves. Metal snips are used to cut the metal studs and track to the desired lengths. A drill is necessary for driving screws and creating holes for wiring and plumbing. A level and square ensure that the frame is plumb and square, while safety glasses and gloves protect against injury.
Key Point 2: Step-by-Step Construction Process
The construction of an outdoor kitchen using metal studs involves a series of steps, starting with the foundation and ending with the finishing touches. Meticulous attention to detail at each stage is crucial for a durable and professional-looking result.
The first step is to prepare the foundation. This typically involves pouring a concrete slab or constructing a paver base. The foundation should be level and provide a stable surface for the metal frame. Ensure the foundation is adequately sized to accommodate the dimensions of the outdoor kitchen.
Next, assemble the metal frame. Begin by cutting the track to the desired lengths and securing it to the foundation using concrete anchors or screws. Then, cut the metal studs to the appropriate height and insert them into the track, spacing them according to the design. Secure the studs to the track using metal framing screws.
Ensure the frame is plumb and square throughout the assembly process. Use a level to verify that the studs are vertical and a square to check that the corners are at right angles. This will ensure that the finished kitchen is structurally sound and aesthetically pleasing.
Once the frame is assembled, attach the cement board sheathing to the exterior of the frame. Cut the cement board to the desired size and shape and secure it to the metal studs using cement board screws. Ensure that the joints between the cement boards are properly sealed with cement board tape and compound.
Install any necessary wiring and plumbing before proceeding with insulation. Run electrical wires for outlets and lighting, and install plumbing lines for sinks and grills. Ensure that all wiring and plumbing is installed according to local codes and regulations.
Insulate the frame with mineral wool or closed-cell spray foam. The insulation will help regulate the temperature inside the kitchen and protect appliances and plumbing from freezing. Ensure that the insulation is properly installed and sealed to prevent moisture intrusion.
Finally, apply the desired finish to the exterior of the kitchen. This may involve tiling, stone veneer, stucco, or other materials. Ensure that the finish is compatible with the cement board sheathing and is properly installed according to the manufacturer's instructions.
Key Point 3: Considerations for Appliance Integration
Integrating appliances into an outdoor kitchen constructed with metal studs requires careful planning and execution. Ensuring that appliances are properly installed and supported is crucial for safety and functionality.
Before starting construction, determine the exact dimensions and requirements of the appliances to be installed. This includes grills, refrigerators, sinks, and any other cooking equipment. Obtain the manufacturer's specifications for each appliance to ensure that the frame is built to accommodate them.
Reinforce the metal frame in areas where appliances will be installed. This may involve adding additional studs or using thicker gauge metal to provide extra support. Appliances can be heavy, and it is essential to ensure that the frame can bear the weight without sagging or collapsing.
Create cutouts in the cement board sheathing to accommodate the appliances. Ensure that the cutouts are precisely sized and shaped to fit the appliances snugly. Use a jigsaw or other appropriate tool to make clean and accurate cuts.
Provide proper ventilation for grills and other appliances that produce heat. Install vents or openings in the frame to allow for adequate airflow. This will prevent overheating and ensure that the appliances function properly.
Consider using stainless steel components in areas that are exposed to high temperatures or moisture. Stainless steel is resistant to corrosion and can withstand the harsh conditions of an outdoor kitchen. This will help prolong the lifespan of the kitchen and prevent rust or damage to the metal frame.
Ensure all electrical and plumbing connections are made by licensed professionals. Improper wiring or plumbing can be dangerous and may violate local codes. Hire qualified electricians and plumbers to ensure that all connections are safe and up to code.
In conclusion, building an outdoor kitchen using metal studs is a viable and advantageous option for creating a durable, safe, and aesthetically pleasing outdoor cooking space. By understanding the benefits of metal studs, carefully planning the design, and following the step-by-step construction process, it is possible to create an outdoor kitchen that will provide years of enjoyment.

Outdoor Kitchen Framing 11 Helpful Facts You Should Know

How To Build An Outdoor Kitchen With Metal Studs 15 Steps Island Plans

How To Build A Bbq Island With Steel Studs Thegrill Com

Building With Metal Stud Outdoor Kitchen Ideas Plans Island Build

How To Build A Bbq Island With Steel Studs East Coast Grill

Rolling Outdoor Island Building Plans Pneumatic Addict

Building With Metal Stud Outdoor Kitchen Ideas Build Rustic Kitchens

How To Build A Bbq Island With Steel Studs Thegrill Com

Building An Outdoor Kitchen How To Build With Steel

How To Build An Outdoor Kitchen With Metal Studs Guide Pavilion Ideas
Related Posts