Plans To Make Outdoor Bar Stools: A Comprehensive Guide
Creating outdoor bar stools offers a rewarding opportunity to personalize outdoor spaces while adding functional seating. Utilizing readily available plans, individuals can construct durable and aesthetically pleasing stools tailored to their specific needs and preferences. This article explores the key considerations and steps involved in developing and executing plans for building successful outdoor bar stools.
Selecting the Right Plans: Factors to Consider
The initial step in crafting outdoor bar stools involves choosing suitable plans. Numerous free and paid plans are accessible online and through woodworking resources. The selection process necessitates a careful evaluation of several critical factors.
Material Choice: Plans often specify particular materials, primarily wood, metal, or a combination of both. The choice of material impacts the aesthetic, durability, and structural integrity of the finished product. Wood offers a classic, natural look and is relatively easy to work with, but requires proper sealing and treatment for outdoor use. Metal provides superior strength and weather resistance, but requires welding skills and appropriate tools. Composite materials, such as recycled plastic, offer a balance of durability and low maintenance. Plans should be selected based on the individual's skill level and access to tools and materials.
Design Complexity: Bar stool designs range from simple, straight-legged structures to more intricate designs with contoured seats, backrests, and footrests. Beginners should opt for simpler plans with fewer components and straightforward joinery techniques. More experienced woodworkers can undertake plans involving complex angles, advanced joinery (such as mortise and tenon), and decorative elements. Complexity directly influences the time, effort, and skill required to complete the project.
Dimensions and Ergonomics: Bar stools are characterized by their height, which must be appropriate for the bar or table they will accompany. Standard bar height is typically between 40 and 42 inches, necessitating a stool seat height of around 28 to 30 inches. Counter height bars are generally lower, requiring stools with a seat height of 24 to 26 inches. Plans should specify the overall dimensions of the stool, including seat height, seat width, and overall height. Ergonomic considerations, such as seat comfort and footrest placement, are also important. Contoured seats offer better support, and a well-positioned footrest enhances comfort during extended use. Plans should provide details on these ergonomic factors.
Weather Resistance: Outdoor furniture must withstand exposure to the elements, including sun, rain, and temperature fluctuations. Plans should incorporate design features that enhance weather resistance, such as sloped surfaces to shed water, gaps between seat slats to allow for air circulation, and rust-resistant hardware. Material selection is critical, with naturally rot-resistant woods like cedar, redwood, and teak being preferred. Pressure-treated lumber is a cost-effective option, but requires careful handling and finishing. Metal components should be coated with rust-inhibiting paint or powder coating. The plans should also outline appropriate finishing techniques to protect the wood or metal from the elements.
Weight Capacity: The plans must specify the maximum weight capacity of the bar stool. This is particularly important for stools intended for use by adults. The design should incorporate structural elements that provide adequate support and stability, such as sturdy legs, reinforced joints, and appropriately sized lumber. The weight capacity should be clearly stated in the plan to ensure the safety of users.
Preparing for Construction: Materials, Tools, and Workspace
Once suitable plans have been selected, the next step involves gathering the necessary materials, tools, and preparing a suitable workspace. This preparatory phase is crucial for ensuring a smooth and efficient construction process.
Materials Procurement: A detailed materials list is typically included in the chosen plan. It is essential to accurately calculate the quantities of lumber, hardware (screws, bolts, nails), and finishing supplies needed. Purchasing slightly more material than required is advisable to account for errors or waste. When selecting lumber, inspect each piece for defects such as knots, cracks, and warping. Opt for straight, clear lumber to minimize challenges during construction. The choice of hardware is equally important. Use exterior-grade screws and bolts that are resistant to corrosion. Stainless steel hardware is preferred for its superior durability in outdoor environments. Acquire finishing supplies such as wood sealant, stain, paint, or varnish appropriate for the chosen material and desired aesthetic.
Tool Inventory and Preparation: The specific tools required will depend on the complexity of the plan and the chosen materials. Basic woodworking tools include a saw (circular saw, hand saw, or miter saw), a drill with various bits, a measuring tape, a level, a square, a screwdriver, a hammer, and sandpaper. More advanced projects may require specialized tools such as a router, a jigsaw, a planer, or a wood lathe. Ensure that all tools are in good working order and properly sharpened. Dull tools can lead to inaccurate cuts and increased effort. Safety equipment, such as safety glasses, ear protection, and a dust mask, are essential for protecting oneself from injury. Welding equipment, including a welding machine, helmet, and gloves, are necessary for projects involving metal construction.
Workspace Setup: A well-organized workspace is crucial for efficient and safe construction. Select a level and stable surface for working, free from obstructions. Adequate lighting is essential for accurate cutting and assembly. Ensure proper ventilation, especially when working with paints, stains, or adhesives. Lay down drop cloths or tarps to protect the floor from spills and debris. Organize tools and materials within easy reach to minimize downtime. Consider setting up a dust collection system to reduce the amount of airborne dust. A clean and organized workspace promotes efficiency and reduces the risk of accidents.
Execution and Assembly: Following the Plan Precisely
The execution and assembly phase involves following the selected plan closely to cut, shape, and assemble the bar stool components. Precision and attention to detail are critical for achieving a structurally sound and aesthetically pleasing finished product.
Cutting and Shaping Components: Begin by carefully measuring and cutting the lumber or metal according to the dimensions specified in the plan. Use a sharp saw and a straight edge to ensure accurate cuts. For angled cuts, a miter saw or a protractor can be used. When shaping components, follow the plan closely and use appropriate tools such as a router, a jigsaw, or a plane. Pay attention to the grain direction of the wood when shaping to prevent splintering or tear-out. Smooth all cut edges and surfaces with sandpaper to remove any imperfections. For metal components, use a grinder or a file to remove sharp edges and burrs.
Assembling the Structure: Assemble the bar stool components according to the plan's instructions. Use appropriate joinery techniques, such as screwing, bolting, nailing, or welding, to securely connect the components. Ensure that all joints are tight and flush. Use wood glue in conjunction with screws or nails for added strength. When welding, use proper safety precautions and ensure that all welds are strong and clean. Regularly check the alignment and squareness of the structure as you assemble it. Use a level and a square to ensure that the stool is stable and true. Correct any errors or misalignments immediately to prevent them from compounding later in the assembly process.
Finishing and Protection: Once the assembly is complete, apply a protective finish to the bar stool to enhance its appearance and protect it from the elements. For wooden stools, apply a sealant or primer to prepare the surface for finishing. Then, apply a stain, paint, or varnish according to your desired aesthetic. Apply multiple coats of finish, allowing each coat to dry completely before applying the next. Sand lightly between coats to achieve a smooth and even finish. For metal stools, apply a rust-inhibiting primer followed by a topcoat of exterior-grade paint or powder coating. Ensure that all surfaces are thoroughly coated to prevent corrosion. Allow the finish to dry completely before using the bar stool. Consider adding protective feet or glides to the bottom of the legs to prevent scratching or damage to the patio surface.
In summary, crafting outdoor bar stools involves careful planning and execution. By selecting appropriate plans, gathering the necessary materials and tools, and following the instructions precisely, individuals can create durable and aesthetically pleasing seating that enhances their outdoor living spaces. Attention to detail and a commitment to quality craftsmanship are essential for achieving a successful and long-lasting result.

How To Build Outdoor Bar Stools The Diy Dreamer

How To Make Bar Stools Diy Projects With Pete

How To Make Bar Stools Diy Projects With Pete

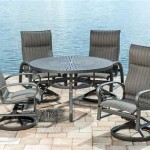
Outdoor Bar Stool Plans Myoutdoorplans

How To Make Bar Stools Diy Projects With Pete

How To Build Outdoor Bar Stools The Diy Dreamer

How To Build Outdoor Bar Stools The Diy Dreamer

How To Make Bar Stools Diy Projects With Pete

Easiest Bar Stools Ever Free Diy Plans Rogue Engineer

How To Build Outdoor Bar Stools The Diy Dreamer
Related Posts