Installing an Outdoor Ceiling Fan: A Comprehensive Guide
Enhancing outdoor living spaces with an outdoor ceiling fan provides increased comfort during warmer months. This article details the process of installing an outdoor ceiling fan, adhering to safety standards and best practices for a successful and durable installation. Prior planning and careful execution are crucial to ensuring the fan operates efficiently and safely for years to come.
Key Point 1: Safety Precautions and Pre-Installation Planning
Prior to commencing any electrical work, safety must be the utmost priority. Always disconnect the electrical power at the circuit breaker that controls the intended location for the ceiling fan. Confirm the power is off using a non-contact voltage tester. Never assume the wiring is de-energized based on the breaker position alone.
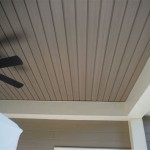
Next, assess the suitability of the chosen location. Outdoor ceiling fans must be installed in locations rated for damp or wet conditions, depending on the level of exposure to the elements. A damp-rated fan is suitable for covered patios or porches, while a wet-rated fan is designed for locations directly exposed to rain or snow. Verify the location's rating before proceeding. Using an incorrectly rated fan can lead to electrical hazards and premature failure. Furthermore, confirm the structural integrity of the mounting location. The ceiling joists or supporting structure must be capable of supporting the weight of the fan, typically ranging from 20 to 50 pounds. If the existing structure is inadequate, reinforcement is necessary.
Gather all necessary tools and materials before starting the installation. These typically include:
*Outdoor-rated ceiling fan kit, complete with all hardware
*Screwdriver set (Phillips head and flathead)
*Wire strippers and wire connectors (suitable for outdoor use)
*Electrical tape
*Non-contact voltage tester
*Ladder
*Drill with appropriate drill bits (if required for mounting)
*Pencil or marker
*Measuring tape
*Safety glasses
*Gloves
Carefully review the manufacturer's instructions included with the ceiling fan. These instructions provide specific guidance for the particular model being installed and should be followed closely.
Check the local building codes and electrical regulations. Some jurisdictions may require a permit for electrical work or have specific requirements for ceiling fan installations. Compliance with these regulations is essential for safety and legal reasons.
Key Point 2: Mounting the Ceiling Fan and Wiring Connections
The mounting bracket is the critical component that secures the ceiling fan to the ceiling. If an existing light fixture is being replaced, remove the fixture carefully, taking note of the wiring connections. The electrical box must be rated to support the weight of the ceiling fan. Standard plastic electrical boxes are generally not sufficient and should be replaced with a fan-rated box that is securely attached to the joists or framing.
Install the mounting bracket according to the manufacturer's instructions. Ensure it is firmly attached to the ceiling joist or supporting structure using appropriate screws or lag bolts. If necessary, pre-drill pilot holes to prevent splitting the wood. The mounting bracket should be level to ensure the fan operates smoothly and without wobbling.
Once the mounting bracket is securely in place, prepare the wiring connections. Identify the incoming power wires (typically black for hot, white for neutral, and green or bare copper for ground). Using wire strippers, carefully remove a small amount of insulation from the ends of the wires. Connect the fan wires to the corresponding wires in the electrical box using wire connectors approved for outdoor use. Ensure the connections are tight and secure. Wrap the wire connectors with electrical tape for added protection against moisture.
The wiring connections should adhere to the following color code:
*Black (hot) wire from the power source to the black (or blue) wire from the fan.
*White (neutral) wire from the power source to the white wire from the fan.
*Green (ground) wire from the power source to the green or bare copper wire from the fan and the grounding terminal on the mounting bracket.
Meticulous attention must be given to grounding. A proper ground connection is essential for safety and helps prevent electrical shocks. All exposed metal parts of the fan should be grounded.
Carefully tuck the wires into the electrical box, ensuring they are not pinched or damaged. Attach the ceiling fan motor housing to the mounting bracket according to the manufacturer's instructions. Most fans use a ball-and-socket system or a similar mechanism that allows the fan to hang freely while making connections.
Key Point 3: Assembling the Fan Blades and Testing the Operation
After the motor housing is securely mounted, attach the fan blades. Most fan blades are attached to blade irons, which are then attached to the motor housing. Follow the manufacturer's instructions carefully to ensure the blades are properly aligned and balanced. Each blade should be securely fastened to the blade iron, and each blade iron should be securely fastened to the motor housing. Torque each screw to the manufacturer's specifications.
Once the blades are attached, install the light kit, if applicable. Connect the light kit wiring to the appropriate wires in the motor housing, following the manufacturer's instructions. Secure the light kit to the motor housing using the provided hardware.
Before restoring power, visually inspect all connections and components to ensure everything is properly assembled and secured. Confirm that all screws are tight and that no wires are exposed.
Restore power at the circuit breaker. Test the fan’s operation at different speeds to ensure it is functioning correctly. Verify that the light kit is also working properly. If the fan wobbles excessively, check the blade alignment and the tightness of the screws. Most ceiling fans come with a balancing kit that can be used to correct minor wobbling. Follow the instructions included with the balancing kit.
Weatherproofing is crucial for outdoor installations. Apply silicone caulk around the canopy (the part of the fan that covers the electrical box) to seal any gaps and prevent water from entering the electrical box. Ensure all exposed screws and hardware are corrosion-resistant to withstand the elements.
Regular maintenance is essential to prolong the life of the outdoor ceiling fan. Periodically inspect the fan for loose screws, corrosion, or other damage. Clean the blades regularly to remove dust and debris. Lubricate the motor bearings, if required, according to the manufacturer’s instructions.
If any problems arise during the installation or operation of the ceiling fan, consult a qualified electrician. Attempting to repair electrical problems without proper knowledge and training can be dangerous.
Properly installed and maintained, an outdoor ceiling fan can provide years of comfort and enjoyment, enhancing the outdoor living experience.
Following these guidelines will help ensure a safe and effective installation, providing comfort and enjoyment for years to come. Remember, prioritizing safety and adhering to manufacturer instructions are paramount for a successful outdoor ceiling fan installation.

Installing An Outdoor Ceiling Fan

Installing An Outdoor Ceiling Fan On A Covered Patio Neighborly

How To Install An Outdoor Ceiling Fan Step By Raleigh Electricians

Need Help Mounting Our New Outdoor Ceiling Fan Under Pergola

How To Install Outdoor Fans Young House Love

How To Install Outdoor Fan Into Hollow Aluminum Patio Ceiling Frame Doityourself Com Community Forums

Installing An Outdoor Ceiling Fan

Here S How To Install An Outdoor Ceiling Fan Have Breezy Summer Nights

How To Install Outdoor Fans Young House Love

We Installed An Additional Fan And Light Yardistry