How To Replace a Motion Sensor on an Outdoor Light
Outdoor motion sensor lights provide enhanced security and convenience. They automatically illuminate when movement is detected, deterring potential intruders and providing safe passage in the dark. However, like any electronic component, motion sensors can fail due to various factors such as weather exposure, age, or power surges. Replacing a faulty motion sensor is a straightforward task that can often be accomplished by a homeowner with basic electrical knowledge and tools, saving the cost of hiring an electrician. This article outlines the process of replacing a motion sensor on an outdoor light fixture.
Before initiating any electrical work, safety precautions are paramount. Electricity can be dangerous, and it is crucial to disconnect the power supply to the fixture before commencing any repairs. This is typically done at the circuit breaker or fuse box that controls the light. Locate the correct breaker or fuse (refer to your electrical panel directory if necessary) and switch it to the "off" position. To confirm that the power is indeed off, use a non-contact voltage tester to check the wires at the light fixture. If the tester indicates the presence of voltage, double-check that you have turned off the correct breaker. If the situation is uncertain, it is best to consult with a qualified electrician.
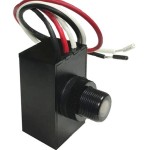
Once the power is safely disconnected, gather the necessary tools and materials. This will include a ladder (if the fixture is mounted high), a screwdriver (Phillips head and/or flat head, depending on the fixture), wire strippers, wire connectors (wire nuts or push-in connectors), electrical tape, a new motion sensor, and safety glasses. The replacement motion sensor should be compatible with the existing light fixture in terms of voltage and wiring configuration. It is crucial to purchase the correct replacement to ensure proper functionality and avoid potential electrical hazards.
Identifying the Faulty Motion Sensor
The first step in replacing the motion sensor is to confirm that it is indeed the source of the problem. Common symptoms of a failing motion sensor include the light staying on continuously, not turning on at all when motion is detected, or flashing erratically. However, before assuming the sensor is faulty, it is important to rule out other potential causes. For example, a blown light bulb can mimic a motion sensor problem. Replace the bulb with a new one to see if that resolves the issue. Also, check the sensitivity and range settings on the motion sensor itself. These settings can sometimes be accidentally adjusted, leading to unexpected behavior. Consult the motion sensor's manual for instructions on adjusting these settings.
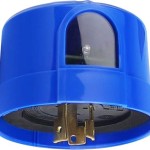
Another potential cause of problems is the photocell, which is the component that detects ambient light levels. If the photocell is malfunctioning, the light may not turn on at night or may turn on during the day. In some fixtures, the photocell is integrated into the motion sensor, while in others it is a separate component. If the photocell is separate, it may be possible to replace it independently. If, after checking these other possibilities, the light still malfunctions, then the motion sensor is likely the culprit and needs replacement.
Once you've determined that the motion sensor is faulty, take a close look at the existing sensor and its connection to the light fixture. Note the wiring configuration, including the colors of the wires and how they are connected. Taking a picture or making a diagram can be helpful to ensure that you connect the new sensor in the same way. This is particularly important if you are not familiar with electrical wiring.
Removing the Old Motion Sensor
With the power off and the wiring configuration noted, the next step is to remove the old motion sensor from the light fixture. The method of removal will vary depending on the design of the fixture. Some sensors are attached with screws, while others are held in place by clips or interlocking tabs. Carefully examine the sensor and the light fixture to identify the method of attachment. Once you have determined how the sensor is attached, use the appropriate tool (usually a screwdriver) to loosen or detach it. If the sensor is difficult to remove, avoid forcing it, as this could damage the fixture.
After detaching the sensor from the fixture, disconnect the wires. Typically, motion sensors have three wires: a hot wire (usually black), a neutral wire (usually white), and a ground wire (usually green or bare copper). These wires are connected to the corresponding wires in the light fixture using wire connectors (wire nuts or push-in connectors). To disconnect the wires, carefully unscrew the wire nuts or release the push-in connectors. As you disconnect each wire, double-check that you are properly separating it from the corresponding wire in the fixture. Keep track of which color wire went to which, referring to your notes or diagram if necessary.
Once all the wires are disconnected, the old motion sensor can be completely removed from the light fixture. Before discarding it, inspect it for any signs of damage, such as cracked housing or burnt wires. This inspection may provide clues as to the cause of the failure and help prevent similar issues in the future.
Installing the New Motion Sensor
With the old motion sensor removed, the next step is to install the new one. Begin by connecting the wires from the new sensor to the corresponding wires in the light fixture. Use the same type of wire connectors that were used previously (wire nuts or push-in connectors). Match the colors of the wires carefully: black to black (hot), white to white (neutral), and green or bare copper to green or bare copper (ground). Ensure that the connections are secure and that no bare wire is exposed. Wrap the wire connectors with electrical tape for added insulation and protection.
If using wire nuts, twist the wires together tightly before screwing on the wire nut. If using push-in connectors, insert the wires fully into the connector until they are firmly held in place. After making each connection, gently tug on the wires to ensure that they are secure. Loose connections can cause malfunctions and can even be a fire hazard.
Once all the wires are connected, carefully tuck the wires back into the light fixture housing. Position the new motion sensor in the fixture and secure it using the same method that was used to attach the old sensor (screws, clips, or tabs). Ensure that the sensor is firmly in place and that it is oriented correctly. The sensor should be positioned so that it has a clear view of the area that you want it to detect motion in.
After the new motion sensor is installed, restore power to the light fixture by switching the circuit breaker or fuse back to the "on" position. Test the light to ensure that it is functioning properly. Walk around in the sensor's detection area to see if the light turns on as expected. If the light does not turn on, double-check the wiring connections and the sensor's settings. Most motion sensors have adjustable sensitivity and range settings. Refer to the sensor's manual for instructions on how to adjust these settings.
If the light stays on continuously, even after adjusting the settings, there may be a problem with the sensor's timer. The timer controls how long the light stays on after motion is detected. If the timer is set to a very long duration, the light may appear to be staying on continuously. Try adjusting the timer to a shorter duration to see if that resolves the issue.
By following these steps, a homeowner can successfully replace a motion sensor on an outdoor light fixture. Always prioritize safety by disconnecting the power supply before commencing any electrical work. Proper identification of the problem and correct installation of the new sensor are essential for ensuring proper functionality and preventing future issues. If any uncertainty arises during the process, consulting with a qualified electrician is recommended.

Motion Light Sensor Replacement

How To Replace A Motion Sensor Light

How To Wire Motion Sensor Occupancy Sensors

How To Install A Motion Sensor Light The Home Depot

How To Replace An Exterior Flood Light With Motion Sensor

How To Wire Motion Sensor Occupancy Sensors

How To Add A Motion Sensor Your Existing Outdoor Lights In 15 Minutes 24 7 Home Security

How To Install And Wire A Motion Sensor Security Light

Installing A Remote Motion Detector For Lighting Diy

How To Install A Motion Sensor Light The Home Depot