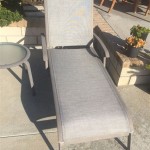
How To Make Seat Cushions For Outdoor Furniture
Outdoor furniture can significantly enhance the comfort and aesthetics of patios, decks, and gardens. However, the cushions that accompany these pieces often bear the brunt of exposure to the elements. Sun, rain, and general wear and tear can degrade their appearance and functionality over time. Creating custom seat cushions offers a cost-effective and personalized solution for refreshing outdoor furniture and extending its lifespan. This article details the process of crafting durable and aesthetically pleasing seat cushions for outdoor use.
Key Considerations Before Starting
Before embarking on the cushion-making process, several factors warrant careful consideration. These preliminary steps will significantly influence the final product and ensure a successful outcome.
Measurements: Accurate measurements are paramount. The dimensions of the furniture seat should be precisely recorded, accounting for any curves or irregular shapes. It is advisable to create a template using paper or cardboard to ensure the cushion fits snugly and securely. Add an extra inch or two to your measurements for seam allowance and cushion plumpness.
Fabric Selection: The choice of fabric is critical for outdoor cushions. Look for materials specifically designed for outdoor use. These fabrics are typically treated to resist water, fading, and mildew. Common options include solution-dyed acrylic, polyester, and olefin. Solution-dyed fabrics offer superior colorfastness compared to printed fabrics. Consider the fabric's weight and durability in relation to the intended use. Thicker, heavier fabrics are generally more resistant to wear and tear.
Foam Selection: The type of foam used will dictate the comfort and longevity of the cushion. High-density foam is recommended for outdoor applications due to its resilience and resistance to compression. Open-cell foam is a less expensive option, but it tends to retain water and degrade more quickly. Closed-cell foam is waterproof but can be less comfortable. Consider wrapping the foam in a layer of batting, such as polyester fiberfill, to provide a softer surface and protect the foam from friction.
Tools and Materials: Gather all necessary tools and materials before commencing the project. This includes a sewing machine, fabric scissors, measuring tape, pins, thread, zipper (optional), and any decorative trim or embellishments. Ensure the sewing machine is equipped with a needle suitable for the chosen fabric. Outdoor thread, typically made of polyester or nylon, is essential for withstanding the elements.
Step-by-Step Guide to Cushion Construction
The following steps outline the process of creating a standard square or rectangular seat cushion. Adjustments may be necessary for cushions with unique shapes or features.
Cutting the Fabric: Using the measurements and template, cut the fabric pieces for the top, bottom, and sides of the cushion. Remember to add seam allowances of at least 1/2 inch to all edges. For a square or rectangular cushion, this will typically involve cutting two identical pieces for the top and bottom and four pieces for the sides (or one long folded piece). If incorporating a zipper, cut the bottom piece in half to accommodate the zipper insertion.
Sewing the Sides: Sew the side pieces together to form a continuous band. If using four separate pieces, sew them end-to-end to create a rectangular shape. If using one long piece, fold it in half and sew the ends together. Press the seams open to reduce bulk and create a neater finish.
Inserting the Zipper (Optional): If desired, insert a zipper into the seam of the bottom piece. This facilitates easy removal of the cushion cover for cleaning. Use a zipper foot on the sewing machine for accurate and even stitching. Alternatively, Velcro closures, buttons, or ties can be used as alternatives to zippers.
Attaching the Top and Bottom: Pin the top piece to the side band, aligning the edges and corners carefully. Sew the top piece to the side band, working slowly and carefully to maintain a consistent seam allowance. Repeat the process for the bottom piece, leaving a small opening for turning the cushion cover right-side out. If a zipper has been installed, ensure it is partially open during this step.
Turning and Stuffing: Turn the cushion cover right-side out through the opening. Gently push out the corners to create sharp and defined edges. Insert the foam core into the cushion cover. If the foam is slightly larger than the cover, it may be necessary to compress it slightly during insertion. Ensure the foam is evenly distributed within the cover.
Closing the Opening: Once the foam is inserted, carefully close the opening using a blind stitch or a machine stitch. A blind stitch creates an invisible closure, while a machine stitch provides a more secure and durable finish.
Adding Finishing Touches
The final steps involve adding decorative elements and ensuring the cushion is secure and comfortable.
Piping and Trim: Piping or trim can be added to the edges of the cushion for a more polished and professional look. Piping involves encasing a cord within fabric and sewing it along the edges of the cushion cover. Various types of trim, such as fringe, tassels, or braided cord, can also be attached to the cushion edges. These additions require careful planning and precise stitching.
Button Tufting: Button tufting can add visual interest and prevent the cushion from becoming too flat over time. This involves sewing buttons through the cushion at regular intervals, creating a series of indentations. Button tufting requires specialized tools and techniques but can significantly enhance the aesthetic appeal of the cushion.
Securing the Cushion: Depending on the design of the furniture, it may be necessary to secure the cushion in place. This can be achieved by attaching ties, Velcro straps, or non-slip fabric to the underside of the cushion. These attachments prevent the cushion from sliding or shifting during use.
Waterproofing: Although outdoor fabrics are generally water-resistant, applying a waterproofing spray can provide an extra layer of protection. Follow the manufacturer's instructions carefully when applying waterproofing sprays, and ensure the cushion is completely dry before use.
Cleaning and Maintenance: Regular cleaning and maintenance can extend the life of the cushion. Spot clean stains as they occur, and periodically wash the cushion cover according to the fabric manufacturer's instructions. Store cushions indoors during periods of inclement weather to prevent water damage and fading.
Creating custom seat cushions for outdoor furniture is a rewarding project that allows for personalization and cost savings. By carefully selecting materials, following the steps outlined above, and paying attention to detail, one can create durable and attractive cushions that enhance the comfort and beauty of any outdoor space. The longevity of these cushions depends on the quality of materials used and the diligent maintenance practices employed. Proper storage during harsh weather conditions is also crucial for preserving their appearance and functionality.

Diy Outdoor Cushions A Erfly House

Sew Easy Outdoor Cushion Covers Confessions Of A Serial Do It Yourselfer

Diy Outdoor Seat Cushions Curlycraftymom Com

Sew Easy Outdoor Cushion Covers Confessions Of A Serial Do It Yourselfer

Easy Ways To Make Indoor And Outdoor Chair Cushion Covers In My Own Style

How To Make Outdoor Waterproof Cushions Diy Setting For Four Interiors

Diy Outdoor Cushions

Diy Outdoor Cushion In Less Than An Hour How To Make Cushions For Patio Furniture

No Sew Patio Cushion Covers

How To Sew A Half Round Seat Cushion Cover For My Outdoor Wicker Chairs Cushions
Related Posts