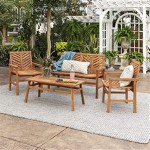
How To Make Outdoor Bench Cushions
Creating comfortable and aesthetically pleasing outdoor bench cushions can significantly enhance the enjoyment of any outdoor space. This article provides a comprehensive guide to crafting durable and weather-resistant cushions, suitable for various bench sizes and styles. This guide focuses on practical steps and essential considerations for a successful DIY project.
Materials and Tools Required
The initial stage involves gathering the necessary materials and tools. The quality of these components directly impacts the final product's longevity and comfort.
Fabric Selection: Choosing the correct fabric is crucial for outdoor applications. Opt for materials specifically designed for outdoor use, such as:
• Solution-Dyed Acrylic: This fabric is highly resistant to fading, water damage, and mildew. It is often the most expensive option but offers superior performance and longevity.
• Polyester Outdoor Fabric: Polyester is a more budget-friendly option that still boasts decent water resistance and UV protection. Look for fabrics treated with water-repellent finishes.
• Olefin: This fabric is known for its durability and resistance to stains, mildew, and sunlight. It's a good middle-ground option in terms of price and performance.
The amount of fabric required depends on the size and number of cushions being made. Measure the bench dimensions accurately and add extra fabric for seam allowances and potential errors. It is generally advisable to purchase extra fabric to accommodate unforeseen cutting mistakes or future repairs.
Cushion Fill: The type of fill determines the cushion's comfort and support. Common options include:
• Outdoor Foam: This specialized foam is designed to resist water absorption and mildew growth. It's denser than regular foam, providing better support and durability for outdoor use. Consider the desired thickness of the cushion when selecting the foam. High-density foam is recommended for benches that will undergo heavy use.
• Polyester Fiberfill: While less expensive than foam, fiberfill can lose its shape and become lumpy over time, especially when exposed to moisture. It is more suited for decorative pillows rather than bench cushions designed for frequent use. If using fiberfill, consider enclosing it in a muslin bag to prevent it from shifting and clumping.
• Shredded Foam: This option offers a balance between comfort and affordability. It conforms to the body well but can also retain moisture if not properly protected. Consider using a waterproof liner around the shredded foam.
Other Essential Materials:
• Thread: Use outdoor-specific thread made from polyester or nylon. These threads are resistant to UV damage and mildew.
• Zipper: A zipper allows for easy removal and cleaning of the cushion cover. Choose a rust-proof zipper designed for outdoor use.
• Waterproof Liner (Optional): This adds an extra layer of protection against moisture, especially if using foam or fiberfill that is not inherently water-resistant.
Tools:
• Sewing Machine: A sewing machine is essential for creating durable and professional-looking seams.
• Scissors or Rotary Cutter: These are used for accurately cutting the fabric.
• Measuring Tape: Accurate measurements are critical for ensuring the cushion fits the bench properly.
• Ruler or Straight Edge: Used for creating straight lines when cutting fabric.
• Pins: Pins hold the fabric pieces together before sewing.
• Marker or Chalk: Used for marking cutting lines on the fabric.
Cutting and Sewing the Cushion Cover
This stage involves precisely cutting the fabric according to the bench dimensions and sewing the pieces together to create the cushion cover.
Measuring and Cutting:
• Determine Cushion Dimensions: Measure the length, width, and desired thickness of the cushion. Add seam allowances (typically 1/2 inch to 1 inch) to all sides. For example, if the bench is 48 inches long and 18 inches wide, and the desired cushion thickness is 4 inches, add seam allowances to the length and width to determine the cut size for the top and bottom pieces.
• Create a Pattern (Optional): For complex shapes or multiple cushions, create a paper pattern based on the measurements. This helps ensure consistency and accuracy.
• Cutting the Fabric: Lay the fabric flat on a large, clean surface. Use the measuring tape and ruler to mark the cutting lines. Secure the fabric with weights or pins to prevent it from shifting. Carefully cut the fabric along the marked lines using scissors or a rotary cutter.
• Cut the Side Panels (Boxing): For a cushion with defined edges, cut side panels (boxing) that match the desired thickness of the cushion. The length of the side panels should equal the perimeter of the cushion (length + width + length + width) plus seam allowances.
Sewing the Cover:
• Attaching the Side Panels: Pin the side panels to the top piece of the cushion cover, right sides together. Sew along the edges, creating a continuous seam. Repeat this process to attach the side panels to the bottom piece of the cushion cover, leaving one side partially open for inserting the cushion fill.
• Inserting the Zipper: Install a zipper along the partially open side of the cushion cover. Use a zipper foot on the sewing machine for a clean and professional finish. Ensure the zipper is properly aligned and securely sewn in place.
• Reinforcing Seams: Reinforce all seams with a double stitch or serger to prevent fraying and ensure durability.
• Turning and Finishing: Turn the cushion cover right side out. Use a point turner or blunt object to push out the corners and create sharp edges. Press the seams with an iron for a crisp finish.
Inserting the Cushion Fill and Final Touches
This final step involves inserting the chosen fill into the sewn cushion cover and adding any finishing details to enhance its appearance and functionality.
Inserting the Fill:
• Preparation: If using a waterproof liner, insert the foam or fiberfill into the liner before inserting it into the cushion cover. This provides an extra layer of protection against moisture.
• Insertion: Carefully insert the foam or fiberfill into the cushion cover through the zipper opening. Ensure the fill is evenly distributed to prevent lumps and maintain the cushion’s shape. For foam, it might be necessary to compress it slightly to fit it through the opening. For fiberfill, gently fluff it as it is inserted to create a fuller appearance.
• Closing the Zipper: Once the fill is properly positioned, close the zipper securely. Ensure the zipper pull is tucked away to prevent it from catching on clothing or other objects.
Final Touches:
• Button Tufting (Optional): Add button tufting for a decorative touch and to prevent the fill from shifting. Mark the desired button locations on the cushion cover. Use a long needle and strong thread to sew the buttons through the cushion, pulling them tightly to create a tufted effect. Secure the thread on the underside of the cushion.
• Piping or Welt Cord (Optional): Add piping or welt cord along the edges of the cushion cover for a more polished look. This involves sewing a fabric-covered cord into the seams of the cover.
• Securing Straps or Ties (Optional): Attach straps or ties to the cushion to secure it to the bench. This prevents the cushion from sliding around and adds an extra layer of stability. Sew the straps or ties to the underside of the cushion, positioning them to align with the bench supports.
Care and Maintenance:
To prolong the life of the outdoor bench cushions, regular care and maintenance are essential. This includes:
• Cleaning: Spot clean spills and stains immediately using a mild detergent and water. For deeper cleaning, remove the cushion cover and machine wash it on a gentle cycle. Always follow the manufacturer’s instructions for fabric care.
• Storage: During periods of inclement weather or when the bench is not in use, store the cushions in a dry, protected area to prevent moisture damage and fading.
• Regular Inspection: Inspect the cushions regularly for signs of wear and tear, such as frayed seams or damaged fabric. Repair any issues promptly to prevent further damage and extend the life of the cushions.
By following these detailed instructions, anyone can create durable and comfortable outdoor bench cushions that enhance the beauty and functionality of their outdoor living spaces.

How To Sew A Bench Cushion In 2 Hours

How To Make Diy Bench Cushion Covers Indoor Or Outdoor Cover Seat Cushions

Diy Outdoor Cushions A Erfly House

How To Make A No Sew Chair Cushion Cover Diy Outdoor Cushions Sewing Home

Easy Diy Outdoor Bench For Under 30 Our Family Lifestyle

Make Your Own Outdoor Cushions A Beautiful Mess

Diy Outdoor Bench Makeover

Easy No Sew And Budget Friendly Bench Cushions For Patio Just Use A Shower Curtain Fabric Furniture Diy Outdoor

Diy Shower Curtain Cushions Pith Vigor By Roce Greayer

How To Make Diy Bench Cushion Covers Indoor Or Outdoor Cover Seat Cushions