How to Make an Indoor Dining Table Outdoor-Ready
Transforming an indoor dining table for outdoor use requires careful consideration of materials, preparation, and protective measures. Indoor furniture is typically not designed to withstand the elements, so modifications are essential to prevent damage from sun, rain, temperature fluctuations, and humidity. This article outlines the steps involved in converting an indoor dining table for safe and long-lasting outdoor enjoyment.
Choosing the Right Table and Assessing Its Suitability
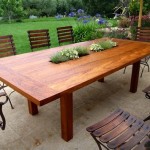
Not all indoor dining tables are suitable candidates for outdoor conversion. The original material of the table plays a significant role in its ability to withstand outdoor conditions. Solid wood tables, while aesthetically pleasing, require more extensive preparation and protection compared to tables made from materials like metal or wrought iron. Veneer tables are generally not recommended for outdoor use, as the veneer can easily delaminate when exposed to moisture.
Consider the type of wood if you are planning to convert a solid wood table. Hardwoods like teak, cedar, and redwood are naturally more resistant to water damage and decay than softwoods like pine. However, all wood types will require proper sealing and protection to ensure longevity outdoors. If the table has intricate carvings or detailing, these areas are more susceptible to water accumulation and may necessitate extra attention during the sealing process.
Examine the table's construction for any existing damage or weak points. Loose joints, cracks, or signs of rot should be addressed before proceeding with any outdoor conversion efforts. Repairing these issues will prevent them from worsening under outdoor conditions. For example, loose joints can be reinforced with wood glue and clamps, while small cracks can be filled with epoxy wood filler.
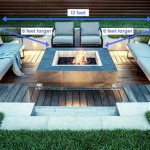
The table's size and weight are also important factors. A larger, heavier table is less likely to be blown over by the wind, while a smaller, lighter table may need to be secured to the ground or weighted down. Consider the positioning of the table in your outdoor space and how exposed it will be to the elements. Areas with partial shade and protection from strong winds will be gentler on the furniture.
Finally, assess the table’s finish. Tables with existing paint or varnish will need to be properly prepared before applying new protective coatings. Peeling or flaking finishes should be removed to ensure proper adhesion of the new sealant. The existing finish may also influence the type of sealant you choose, as some sealants are not compatible with certain types of paint or varnish.
Preparing the Table for Outdoor Use: Cleaning, Sanding, and Repairing
The first step in preparing the table for outdoor use is a thorough cleaning. Remove any dirt, dust, or debris from the surface using a mild soap and water solution. Avoid using harsh chemicals or abrasive cleaners, as these can damage the existing finish or the underlying material. Allow the table to dry completely before proceeding to the next step.
Once the table is clean and dry, sanding is crucial for creating a smooth surface and promoting proper adhesion of the sealant. Use sandpaper with varying grits, starting with a coarser grit (e.g., 80-grit) to remove any existing imperfections or unevenness. Gradually move to finer grits (e.g., 120-grit and 220-grit) to achieve a smooth, even surface. Sand in the direction of the wood grain to avoid scratching the surface. For metal tables, use sandpaper specifically designed for metal surfaces.
If the table has any existing damage, such as cracks, chips, or loose joints, these should be repaired before applying any sealant. Use wood filler or epoxy to fill in any cracks or chips. Allow the filler to dry completely according to the manufacturer's instructions, and then sand it smooth to blend with the surrounding surface. For loose joints, disassemble the joint if possible, clean the surfaces, apply wood glue, and reassemble the joint, clamping it securely until the glue dries.
After sanding and repairing, remove any dust or debris from the table surface using a tack cloth or a vacuum cleaner with a brush attachment. This will ensure a clean surface for the sealant to adhere to properly. Pay particular attention to corners and crevices, where dust can easily accumulate. A clean, smooth surface is essential for achieving a durable and long-lasting finish.
Consider removing any hardware, such as hinges or drawer pulls, if they are made of materials that are not weather-resistant. These can be replaced with stainless steel or other rust-resistant hardware to prevent corrosion. If the hardware cannot be removed, protect it with painter's tape during the sealing process to prevent it from getting coated in sealant.
Applying Protective Coatings and Sealants
The application of protective coatings and sealants is the most critical step in making an indoor dining table suitable for outdoor use. Select a high-quality sealant that is specifically designed for outdoor furniture and is compatible with the table's material. There are several types of sealants available, each with its own advantages and disadvantages. Polyurethane sealants are durable and water-resistant, while spar varnish is flexible and resistant to UV damage. Oil-based sealants penetrate the wood to provide deep protection, while water-based sealants are environmentally friendly and easy to clean up.
Before applying the sealant, read and follow the manufacturer's instructions carefully. Most sealants require multiple coats for optimal protection. Apply each coat thinly and evenly, allowing it to dry completely before applying the next coat. Use a high-quality brush or sprayer for even application. Avoid applying sealant in direct sunlight or high humidity, as this can affect the drying time and the quality of the finish.
For wood tables, consider applying a primer before the sealant. A primer helps to create a smooth, even surface for the sealant to adhere to and can also improve the sealant's durability. Choose a primer that is specifically designed for outdoor use and is compatible with the type of wood and sealant you are using. Apply the primer in thin, even coats, allowing it to dry completely before applying the sealant.
Pay particular attention to areas that are most susceptible to water damage, such as edges, corners, and joints. Apply extra coats of sealant to these areas to provide additional protection. Consider using a sealant with UV inhibitors to protect the table from fading and discoloration caused by sunlight. UV inhibitors help to block harmful ultraviolet rays that can damage the finish and the underlying material.
Once the sealant has been applied and allowed to dry completely, consider applying a topcoat for added protection. A topcoat can provide additional resistance to scratches, stains, and other types of damage. Choose a topcoat that is specifically designed for outdoor use and is compatible with the sealant you have used. Apply the topcoat in thin, even coats, allowing it to dry completely before using the table.
For metal tables, consider using a rust-resistant primer before applying a topcoat of outdoor paint. This will help to prevent rust and corrosion, which can be a major problem for metal furniture exposed to the elements. Choose a paint that is specifically designed for outdoor use and is resistant to fading and chipping. Apply the paint in thin, even coats, allowing it to dry completely before using the table.
Protecting the Table During Outdoor Use
Even with proper preparation and sealing, ongoing maintenance is essential for protecting an indoor dining table used outdoors. Regularly clean the table with a mild soap and water solution to remove dirt, dust, and debris. Avoid using harsh chemicals or abrasive cleaners, as these can damage the finish. Dry the table thoroughly after cleaning to prevent water from accumulating on the surface.
Consider using a waterproof table cover when the table is not in use. This will protect it from rain, snow, sun, and other elements. Choose a cover that is made from a breathable material to prevent moisture from trapping underneath and causing damage. Ensure the cover fits snugly and securely to prevent it from being blown away by the wind.
Periodically inspect the table for any signs of damage, such as cracks, chips, or peeling sealant. Address any issues promptly to prevent them from worsening. Touch up any damaged areas with sealant to maintain the table's protection. Consider reapplying a fresh coat of sealant every year or two, depending on the table's exposure to the elements.
If possible, store the table indoors during harsh weather conditions, such as heavy rain, snow, or extreme temperatures. This will significantly extend the table's lifespan and reduce the need for frequent maintenance. If storing the table indoors is not possible, consider moving it to a more sheltered location, such as under a covered porch or patio.
Use coasters and placemats to protect the table surface from scratches, stains, and heat damage. Avoid placing hot dishes or drinks directly on the table without protection. Wipe up spills immediately to prevent them from soaking into the finish. Consider using furniture pads under the legs of the table to prevent them from scratching or damaging your outdoor flooring.
By following these steps, you can successfully transform an indoor dining table for outdoor use and enjoy it for many years to come. Remember that proper preparation, sealing, and ongoing maintenance are essential for protecting the furniture from the elements and ensuring its longevity.

How You Can Use Indoor Furniture For Outdoor Rustic Crafts Diy

How To Make The Most Of Outdoor Restaurant Furniture In Winter

How To Seal Wooden Furniture When You Move It Outdoors
:max_bytes(150000):strip_icc()/cherishedbliss-2fe16e06a68b44589c6631e6b39ae68f.jpg?strip=all "18 Diy Outdoor Table Plans")
18 Diy Outdoor Table Plans

5 Ways To Create Your Own Outdoor Oasis

13 Durable Diy Outdoor Dining Tables Shelterness

How I Used An Old Wood Dining Table Outside Bird Kitchen Makeover Diy
:max_bytes(150000):strip_icc()/remodelaholic-b957b7f134eb4281be2bcb3dee084626.jpg?strip=all "18 Diy Outdoor Table Plans")
18 Diy Outdoor Table Plans

Simple Modern Outdoor Table Kreg Tool
:strip_icc()/100092481-ca052c16890440868979ff49832f94b9.jpg?strip=all "16 Patio Furniture Ideas To Make Your Backyard A Destination")
16 Patio Furniture Ideas To Make Your Backyard A Destination
Related Posts