How to Install Outdoor Tile on Deck Steps in Revit Family
Creating realistic and detailed deck steps with outdoor tile in Revit requires meticulous planning and execution within the family environment. This article provides a step-by-step guide to successfully model deck steps with tile, ensuring accurate representation and efficient workflow.
1. Defining the Deck Step Geometry
The first step is to establish the basic geometry of the deck steps. This involves creating a solid form that represents the steps using the appropriate tools in Revit's family editor. Begin by drawing the outline of the deck steps, including the tread width, riser height, and overall length. Ensure the dimensions are accurate and reflect the desired design specifications. To create a realistic representation, utilize the "Extrude" or "Sweep" tools to generate the solid volume of the steps. Remember to include any necessary details such as stringers or support beams for structural stability.
2. Creating Tile Geometry and Materials
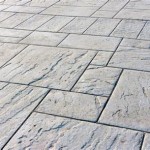
Once the basic deck step geometry is defined, focus on generating the tile geometry and assigning appropriate materials. Start by drawing a single tile in the family editor using the "Rectangle" or "Circle" tools, depending on the tile shape. Adjust the size and dimensions to match the actual tile being used in the project. Next, assign a material to this tile object. Select the "Materials" tab in the "Properties" palette and choose an appropriate material representing the desired tile type. Consider using a detailed and realistic tile material from a library or creating a custom material with specific properties such as color, texture, and gloss.
To ensure consistent tile placement, leverage the "Array" tool. Select the single tile object and use the "Array" tool to create a grid pattern of tiles that covers the entire tread surface of the deck steps. Adjust the spacing between tiles to match the desired layout. For a more realistic look, consider varying the tile arrangement by using different tile sizes or introducing random offsets in the array pattern.
3. Applying Tile to Deck Steps
With the tile geometry and materials established, it's time to apply the tiles to the deck step surfaces. This can be achieved through a combination of methods. One approach is using the "Join Geometry" tool. Select the tile objects and the deck step surface, then activate the "Join Geometry" tool to combine them. This will attach the tiles to the deck step surface, creating a unified geometry. Alternatively, the "Face-based" functionality in Revit can be used. Select the deck step surface and use the "Face-based" option in the "Properties" palette to apply the tile objects as a material. This method allows for more flexibility in controlling how the tiles are applied and their appearance.
4. Advanced Modeling Techniques
For a highly detailed representation, consider incorporating advanced modeling techniques. Here are some suggestions: *
Chamfers and fillets:
Add chamfers or fillets to the edges of the tile objects and the deck steps to create a more realistic and visually appealing look. *Grout lines:
Utilize thin lines or extruded solids to create grout lines between the tiles. This adds realism and enhances the visual impact of the tile installation. *Tile variations:
Introduce different tile sizes, colors, or patterns within the array to add visual interest and break up the monotony of a uniform pattern. *Wear and tear:
Consider adding subtle imperfections to the tile surfaces to simulate age, wear, and weathering patterns. This adds a layer of realism to the model.5. Final Refinement and Documentation
Once the tiles are placed and detailing is complete, review the model for accuracy and aesthetics. Check the tile alignment, spacing, and overall appearance. Make any necessary adjustments to ensure the model meets the design requirements. Finally, generate documentation such as elevations and sections to communicate the deck step design accurately and effectively.
By following these steps, you can successfully model deck steps with outdoor tile in Revit Family. Remember to plan carefully, utilize the appropriate tools, and pay attention to detail to achieve a realistic and accurate representation of the design.

Bim Objects Free IpÊ Deck Tiles Bimobject

Bim Objects Free IpÊ Deck Tiles Bimobject

Autodesk Revit 4 Bedroom Home Design Tutorial 9 Patio

How To Create A Patio Or Deck In Revit Architecture

Bim Objects Free IpÊ Deck Tiles 24 X Bimobject

Stairs With Mutliple Tread Boards Autodesk Community

Deck Tiles Pavers Tile Tech Roof

Bim Objects Free IpÊ Deck Tiles Bimobject

Stairs With Mutliple Tread Boards Autodesk Community

Deck Boards Composite Decking Newtechwood
Related Posts