How To Build Outdoor Steps On A Hill
Constructing outdoor steps on a hillside significantly enhances accessibility, safety, and the aesthetic appeal of your property. This project, while demanding, can be achieved by homeowners with a solid understanding of construction principles and a commitment to safety. This article provides a comprehensive guide for building durable and visually pleasing outdoor steps on a hill.
Before embarking on the endeavor, meticulous planning is crucial. This phase involves assessing the slope, selecting appropriate materials, and obtaining necessary permits. A well-defined plan ensures a smoother construction process and minimizes potential setbacks.
Planning and Preparation
The initial step involves evaluating the terrain of the hill. Determine the total rise (vertical distance from the bottom to the top of the hill) and the total run (horizontal distance). This information is essential for calculating the number of steps required and the dimensions of each step. A steep slope will necessitate more steps with a smaller rise per step, while a gradual slope will require fewer steps with a greater rise.
Consider the intended use of the steps. Will they primarily serve foot traffic, or might they occasionally need to accommodate wheelbarrows or other equipment? This consideration will influence the width of the steps. A minimum width of 3 feet is generally recommended for comfortable foot traffic, but wider steps are advisable for enhanced functionality and visual appeal.
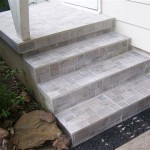
Material selection is critical for the longevity and aesthetics of the steps. Common materials include wood, concrete, stone, and gravel. Wood provides a natural look and is relatively easy to work with, but it requires regular maintenance to prevent rot and decay. Concrete offers superior durability and can be molded into various shapes, but it demands more expertise and specialized equipment for installation. Stone provides a rustic and timeless aesthetic, offering both durability and natural resistance to weathering. Gravel is a more affordable option, often used for temporary or informal pathways. The choice depends on your budget, desired aesthetic, and the prevailing climate.
Before commencing any construction, it is imperative to obtain the necessary permits from your local building authorities. Regulations vary depending on your location, and failure to comply can result in fines or project delays. Check zoning ordinances, building codes, and any specific requirements related to hillside construction.
Gather all essential tools and safety equipment. This includes shovels, rakes, a measuring tape, a level, a wheelbarrow, a tamper, a circular saw (if using wood), a concrete mixer (if using concrete), safety glasses, work gloves, and appropriate footwear. Prioritize safety by wearing protective gear throughout the project.
Mark the location of the steps using stakes and string. This provides a visual guide and ensures that the steps are aligned correctly. Clear the area of any vegetation, rocks, or debris that could obstruct the construction process. Excavate the hillside to create a level base for the first step. This base should extend beyond the footprint of the step to provide adequate support.
Step Construction Techniques
The method of construction will vary depending on the chosen material. Regardless of the material, the fundamental principle remains the same: creating a stable and level platform for each step.
Wood Steps: If using wood, construct a frame for each step using pressure-treated lumber. The frame should be sturdy enough to withstand the weight of foot traffic and resist weathering. Secure the frame to the ground using stakes or concrete footings. Fill the frame with compacted gravel to provide a solid base. Install the step treads (the horizontal surface of the step) using screws or nails. Ensure that the treads are level and securely fastened to the frame. Consider adding risers (the vertical surface of the step) for a more finished look. Treat the wood with a sealant or stain to protect it from moisture and UV damage.
Concrete Steps: For concrete steps, construct forms for each step using lumber or plywood. The forms should be accurately sized and securely supported. Mix the concrete according to the manufacturer's instructions. Pour the concrete into the forms, ensuring that it fills all voids. Use a trowel to smooth the surface of the concrete. Allow the concrete to cure for several days before removing the forms. Consider adding a textured finish to the concrete to improve traction. A non-slip additive can also be incorporated into the concrete mix.
Stone Steps: Building stone steps involves selecting and arranging individual stones to create a stable and aesthetically pleasing pathway. Choose stones that are relatively flat and uniformly sized. Excavate a level base for each step and compact the soil. Place the largest stones on the base, ensuring that they are stable and level. Fill the gaps between the stones with smaller stones or gravel. Use a level to check the alignment of each step. Stone steps can be dry-laid (without mortar) or mortared in place. Dry-laid steps offer a more natural look and are easier to adjust, while mortared steps provide greater stability and durability.
Gravel Steps: Gravel steps are the simplest to construct. Define the edges of each step with edging materials such as wood, stone, or plastic. Excavate a level base for each step and compact the soil. Fill the area with compacted gravel, ensuring that it is evenly distributed. The gravel should be deep enough to provide a stable surface. Regularly replenish the gravel as needed to maintain the depth and stability of the steps.
Regardless of the chosen material, proper drainage is essential to prevent water damage. Install drainage channels or French drains to divert water away from the steps. Ensure that the steps are slightly sloped to allow water to run off. Backfill behind each step with compacted soil or gravel to provide additional support and prevent erosion.
Ensuring Stability and Safety
The stability and safety of the steps are paramount. Steps that are not properly constructed can pose a significant hazard, leading to falls and injuries. Several considerations must be addressed to ensure a safe and durable structure.
Each step should have a consistent rise (vertical height) and run (horizontal depth). Inconsistent step dimensions can disrupt a person’s gait and increase the risk of tripping. A recommended rise is between 6 and 8 inches, and a recommended run is between 10 and 12 inches. Maintain consistent measurements throughout the entire staircase.
Effective drainage is crucial for preventing water damage and erosion. Water accumulation can weaken the structure of the steps and create slippery surfaces. Ensure that the steps are slightly sloped to allow water to run off. Install drainage channels or French drains to divert water away from the steps. Proper drainage will extend the lifespan of the steps and enhance their safety.
Consider adding handrails to the steps, especially if the slope is steep or if the steps are frequently used by elderly individuals or children. Handrails provide additional support and reduce the risk of falls. Handrails should be securely attached to the steps and meet local building codes. The height of the handrail should be between 34 and 38 inches.
Proper lighting is essential for ensuring safety at night. Install outdoor lighting fixtures along the steps to illuminate the pathway. Consider using solar-powered lights to reduce energy consumption. Adequate lighting will improve visibility and reduce the risk of accidents.
Regular maintenance is essential for preserving the stability and safety of the steps. Inspect the steps periodically for signs of damage or wear. Repair any cracks, loose treads, or damaged handrails promptly. Remove any debris, such as leaves or snow, that could create a slippery surface. Apply a sealant or stain to wood steps to protect them from moisture and UV damage. These maintenance tasks will extend the lifespan of the steps and ensure their continued safety.
The area surrounding the steps should be properly landscaped to prevent erosion and enhance the aesthetic appeal. Plant ground cover or shrubs along the hillside to stabilize the soil. Install retaining walls to prevent soil from eroding onto the steps. Landscaping will not only improve the appearance of the steps but also contribute to their long-term stability.
Building outdoor steps on a hill is a challenging but rewarding project. By following these guidelines, homeowners can create a safe, functional, and aesthetically pleasing pathway that enhances the value and enjoyment of their property. Careful planning, proper construction techniques, and diligent maintenance are essential for ensuring the longevity and safety of the steps.

How To Build Steps Up A Hill

How To Build Steps Up A Hill

How To Build Steps Up A Hill

Diy Landscape Steps On A Slope Pt1 Made By Carli

Diy Landscape Steps On A Slope Pt1 Made By Carli

How To Build Steps Up A Hill

Diy Landscape Steps On A Slope Pt1 Made By Carli

Make These Easy Diy Outdoor Stairs For Slopes

How To Build A Basic Staircase For Sloped Yard Quick Tips

Diy Landscape Steps On A Slope Pt1 Made By Carli