```html
How To Build A Finnish Outdoor Sauna
Building a Finnish outdoor sauna is a rewarding project that provides numerous health and social benefits. The process, while demanding, can be broken down into manageable stages. This article outlines the key steps involved in constructing a traditional Finnish sauna in an outdoor setting.
Planning and Preparation
The initial phase of sauna construction necessitates meticulous planning. This encompasses determining the sauna's size, location, design, and materials. Consideration must be given to local building codes and regulations, which may require permits and inspections.
Location: The selected site significantly impacts the sauna experience. Factors to consider include proximity to a water source (lake, pool, or shower), privacy, and exposure to sunlight for optimal warming. Avoid areas prone to water accumulation or excessive wind. A level surface is crucial for a stable foundation.
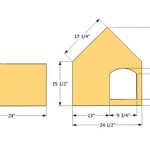
Size and Design: The sauna's dimensions depend on the intended number of users. A small sauna for two individuals might be 6x6 feet, while a larger sauna accommodating four to six people could be 8x10 feet or larger. Design choices include the roof style (gable, shed, or flat), the number of benches, and the location of the door and windows. Traditional Finnish saunas often feature a single room with tiered benches.
Materials: Choosing appropriate materials is vital for longevity and performance. Western Red Cedar, redwood, and spruce are popular choices for sauna construction due to their resistance to rot, low heat conductivity, and pleasant aroma. The sauna stove can be wood-fired or electric, each requiring specific installation considerations. Insulation is essential for retaining heat efficiently. Rock wool or foil-faced fiberglass insulation are commonly used.
Permits and Regulations: Before commencing construction, it is imperative to contact the local building department to ascertain permit requirements and zoning regulations. These regulations may dictate setbacks from property lines, maximum building height, and electrical or plumbing specifications. Failure to comply with these regulations can result in fines and delays.
Foundation and Framing
A solid foundation is paramount for the structural integrity of the sauna. The type of foundation depends on the soil conditions and the size of the sauna. Common foundation options include concrete slab, pier foundations, and gravel pads.
Concrete Slab Foundation: This method provides a stable and level surface. It involves excavating the site, pouring a concrete slab, and ensuring proper drainage. A vapor barrier should be installed beneath the slab to prevent moisture from rising into the sauna.
Pier Foundation: Pier foundations are suitable for uneven terrain or areas with poor drainage. Concrete piers are poured or pre-cast and set into the ground. The sauna frame is then constructed on top of the piers. This allows for air circulation beneath the sauna, reducing moisture buildup.
Gravel Pad Foundation: A gravel pad offers a simpler and less expensive alternative. A layer of compacted gravel provides drainage and a level base. This method is best suited for smaller saunas in well-drained areas.
Framing: Once the foundation is in place, the framing process begins. This involves constructing the walls, roof, and door frames using lumber. The framing should be sturdy and well-braced to withstand the weight of the roof and the stresses of temperature fluctuations. Ensure that the framing is square and level before proceeding.
Wall Construction: The walls are typically framed with 2x4 or 2x6 lumber, depending on the desired insulation thickness. Vertical studs are spaced 16 inches on center. The door and window openings are framed with headers to provide support. Consider adding blocking between studs for added stability and to provide attachment points for interior paneling.
Roof Framing: The roof framing can be constructed using rafters or trusses, depending on the roof style. Rafters are suitable for simple gable or shed roofs, while trusses offer more structural support for larger or more complex roof designs. Ensure that the roof framing is properly sloped for water runoff.
Insulation, Interior Paneling, and Stove Installation
This phase focuses on maximizing heat retention and creating a comfortable sauna environment. Proper insulation is critical to minimizing heat loss and reducing energy consumption. Interior paneling adds aesthetic appeal and helps to distribute heat evenly.
Insulation Installation: Insulation is installed between the wall studs and roof rafters. Rock wool or foil-faced fiberglass insulation are effective choices. The insulation should be cut to fit snugly between the framing members, minimizing air gaps. A vapor barrier is installed over the insulation on the interior side of the walls and roof. This prevents moisture from penetrating the insulation, which can reduce its effectiveness and lead to mold growth.
Interior Paneling: Tongue-and-groove cedar, redwood, or spruce paneling is commonly used for the interior walls and ceiling. The paneling is attached to the framing using nails or screws. Leave a small gap between the paneling boards to allow for expansion and contraction due to temperature changes. Proper ventilation is essential to prevent moisture buildup and maintain air quality. Vents should be installed near the floor and ceiling to allow for air circulation.
Bench Construction: Benches are typically constructed from cedar, redwood, or aspen. The benches should be positioned at different heights to accommodate varying temperature preferences. The higher benches will be hotter than the lower benches. Ensure that the benches are sturdy and comfortable to sit on.
Stove Installation: The sauna stove is the heart of the sauna. Wood-fired stoves and electric stoves require different installation procedures. Wood-fired stoves require a chimney for venting smoke and gases. The chimney must be installed according to local building codes. Electric stoves require a dedicated electrical circuit with adequate amperage. A qualified electrician should install the wiring and ensure that the stove is properly grounded. The stove should be placed on a non-combustible surface, such as concrete or tile. A heat shield should be installed around the stove to protect the surrounding walls from heat damage.
Stone Selection: Sauna stones are placed on top of the stove to store heat. Volcanic rocks are a popular choice due to their ability to withstand high temperatures without cracking. The stones should be thoroughly washed before use to remove any dirt or debris. Place the stones loosely on the stove to allow for air circulation.
Door and Windows: The door should be well-insulated and fit snugly to prevent heat loss. A small window can be added for natural light, but it should be made of tempered glass to withstand high temperatures. The door should swing outward for safety reasons.
Final Checks: Ensure that all electrical connections are secure and properly grounded. Inspect the chimney for any leaks or obstructions. Test the stove to ensure that it is functioning properly. Allow the sauna to heat up gradually to season the wood and prevent cracking. Observe the sauna's performance and make any necessary adjustments to ensure optimal heat retention and ventilation.
```
How To Build A Sauna

Budget Was His Biggest Challenge I Built This Sauna For 1000 By Looking On Craigslist All Day Materials Saunatimes

Custom Built Outdoor Saunas By Finnleo Sauna

How To Build An Outdoor Sauna For Two People

A Simple Formula Good Contractor Sauna Build Start To Finnish Ebook An Authentic Saunatimes

Finnish Sauna 11 Steps With S Instructables

How To Build A Finnish Sauna Cabin Fast And Inexpensively Summer House 24

How To Build Your Own Outdoor Sauna 1859 Oregon S

Building Finland Sauna 3 Months Project

How To Build A Sauna Or Hot Tub By Yourself From Scratch