How to Adjust Outdoor Motion Sensor Lights
Outdoor motion sensor lights are a valuable security enhancement for any home. They deter potential intruders, illuminate pathways for safe passage, and provide peace of mind knowing your property is monitored. However, these lights can also cause unwanted activation, from rustling leaves to passing cars, leading to unnecessary lighting and energy waste. Properly adjusting your outdoor motion sensor lights is crucial to ensure they function effectively and efficiently.
1. Understanding the Sensitivity Settings
Motion sensor lights typically have several adjustable settings to control their sensitivity and response. The most common settings include:
Sensitivity: This setting determines how much movement is required to trigger the light. Higher sensitivity means the light will activate with even slight motion, while lower sensitivity requires more significant movement.
Time Delay: This setting controls how long the light stays on after the sensor detects motion. A longer delay provides more time for movement within the detection zone, while a shorter delay conserves energy.
Detection Range: This setting defines the area the sensor monitors for motion. Adjust the range to focus on specific points of interest, such as doorways, walkways, or driveways, minimizing unnecessary activation.
2. Fine-Tuning the Motion Sensor
The exact steps to adjust your motion sensor lights may vary depending on the model. However, most lights have a common set of adjustment controls. Here's a general guide:
Locate the Adjustment Knobs: Most motion sensor lights have a small, round knob or dial on the side or bottom of the light fixture. This knob allows you to adjust the sensitivity, time delay, and detection range.
Start with a Middle Setting: When adjusting the sensitivity, begin with the middle setting and gradually increase or decrease the sensitivity based on your needs.
Test the Settings: After making any adjustments, test the sensor by walking near it or waving your hand in front of it. Observe the light's response and make further adjustments as needed.
Consider the Environment: Factors such as wind, vegetation, and nearby lights can influence the sensor's performance. Adjust the settings accordingly to minimize false activations.
3. Addressing Common Issues
Even with careful adjustment, you may encounter occasional problems with your outdoor motion sensor lights. Here are some common issues and solutions:
False Activations: If the lights keep turning on without apparent reason, adjust the sensitivity to a lower setting. If the issue persists, check for nearby foliage or structures that may be obstructing the sensor's view.
Ineffective Range: If the lights fail to activate when you walk near them, increase the detection range setting. Ensure that the sensor is positioned with a clear view of the desired area.
Short Duration: If the lights turn off too quickly, extend the time delay setting. However, be mindful of potential energy waste if the delay is too long.
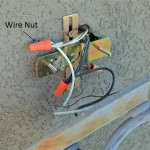
Light Not Turning On: If the light does not turn on at all, check the power supply, fuses, and wiring connections. If the sensor is malfunctioning, you may need to consider replacing it.

How To Alter The Settings On Your Pir Floodlight Security Light Sensor

How To Adjust Your Sensor Light Metro Electrical 24 Hour Electricians

Motion Sensor Lights Tips To Reset Detector

How To Reset Outdoor Motion Sensor Lights Electronicshub

How To Alter The Settings On Your Pir Floodlight Security Light Sensor

120 Led Solar Security Light Black Spv Lights

How To Reset A Motion Sensor Light Lighting And Ceiling Fans The Home Depot

How To Install An Outdoor Motion Sensor Light With S

Adjust Motion Detectors Diy Family Handyman

How To Make A Motion Sensor Light Stay On Rayzeek
Related Posts