DIY Painted Outdoor Rug: A Comprehensive Guide
Outdoor rugs enhance the aesthetic appeal of patios, decks, and porches, providing comfort and defining spaces. While commercially available options offer a wide variety of styles, creating a personalized rug through painting allows for greater customization and cost-effectiveness. This guide details the process of painting an outdoor rug, covering material selection, surface preparation, design execution, and long-term maintenance.
Choosing the Right Rug and Paint
The foundation for a successful painted outdoor rug lies in selecting appropriate materials. The rug's material composition and the paint's properties are crucial for achieving a durable and visually appealing result. Not every rug type is suitable for painting, and not every paint will withstand the rigors of outdoor exposure.
Rug Material: The most suitable rug materials for painting are those with a relatively smooth and absorbent surface. Natural fiber rugs like jute, coir, and canvas are excellent choices. These materials readily accept paint and provide a textured canvas for designs. Synthetic rugs, particularly those made from polypropylene, can also be painted, but require specific preparation and paint types to ensure adhesion. Avoid rugs with dense, plush piles, as these are difficult to paint evenly and the design may not be clearly visible.
Paint Selection: Acrylic paints formulated for outdoor use are the most recommended. These paints are durable, water-resistant, and able to withstand UV exposure. Consider paints specifically designed for fabric or those labeled for exterior use. Always check the manufacturer's instructions for application and drying times. Latex paints may also be used, but ensure they are high-quality exterior grade and are properly primed for fabric adhesion. Another option is using a concrete paint, since these are designed to withstand the elements and constant foot traffic. If using regular craft acrylics, they must be sealed with a durable, exterior-grade sealant after painting.
Additional Considerations: Before committing to a specific rug and paint combination, test the paint on a small, inconspicuous area of the rug. This will allow evaluation of color vibrancy, adhesion, and overall appearance. It also aids in identifying potential issues, such as paint bleeding or uneven absorption, before applying the design to the entire rug.
Preparing the Rug Surface
Proper surface preparation is essential for achieving a long-lasting and visually pleasing painted rug. This involves cleaning the rug, ensuring it is free of debris, and potentially priming the surface to enhance paint adhesion. Neglecting these steps can lead to premature paint peeling, cracking, or fading.
Cleaning the Rug: Begin by thoroughly cleaning the rug to remove any dirt, dust, or debris. This can be accomplished using a vacuum cleaner, a broom, or a combination of both. For heavily soiled rugs, consider washing them with mild soap and water, ensuring they are completely dry before proceeding. Pressure washing is generally not recommended, as it can damage the rug fibers, particularly in natural fiber rugs. Allow the rug to dry in a well-ventilated area, away from direct sunlight, to prevent warping or discoloration.
Priming the Surface: While not always necessary, priming the rug can significantly improve paint adhesion and durability. This is particularly beneficial for synthetic rugs or those with a slick surface. Use a fabric primer or a multi-surface primer that is compatible with the chosen paint. Apply the primer evenly, following the manufacturer's instructions for application and drying times. Consider applying multiple thin coats of primer, rather than one thick coat, to prevent cracking or peeling. Priming can also help to achieve a more uniform color across the rug surface.
Securing the Rug: Secure the rug to a flat, stable surface before painting. This will prevent the rug from shifting during the painting process and ensure even paint application. Use painter's tape or weights to hold the rug in place. Work in a well-ventilated area to minimize exposure to paint fumes.
Designing and Painting the Rug
The design phase allows for creativity and personalization. Careful planning and execution are key to achieving the desired visual effect. Intricate designs can be achieved with stencils, while simpler patterns can be freehand painted. The painting process requires patience, precision, and attention to detail.
Design Selection: Choose a design that complements the existing outdoor decor and reflects personal style. Simple geometric patterns, such as stripes, chevrons, or polka dots, are easy to execute and provide a modern aesthetic. More complex designs, such as floral motifs or intricate mandalas, require greater skill and precision. Consider using stencils to create intricate patterns or to ensure consistent shapes. Stencils can be purchased pre-made or created using a cutting machine or by hand.
Applying the Design: Before applying the paint, sketch the design onto the rug using a pencil or chalk. This will serve as a guide and help to ensure accurate placement. For stencil designs, secure the stencil to the rug using painter's tape. Use a stencil brush or a foam roller to apply the paint, using light, even strokes. Avoid applying too much paint at once, as this can cause bleeding or uneven coverage. Allow each coat of paint to dry completely before applying additional coats. For freehand designs, use a fine-tipped brush for detail work and a larger brush for filling in larger areas. Practice your technique on a scrap piece of fabric before painting the rug to ensure consistent results.
Color Considerations: Choose colors that complement the outdoor environment and existing furniture. Consider using a color palette that incorporates natural tones, such as greens, browns, and blues. Bold, contrasting colors can create a vibrant and eye-catching design. When using multiple colors, allow each color to dry completely before applying the next to prevent bleeding. Consider testing the colors on a scrap piece of fabric to ensure they work well together. Remember that lighter colors may require multiple coats for full coverage, especially on darker rug materials.
Sealing and Protecting the Painted Rug
Sealing the painted rug is a crucial step in protecting the design from the elements and prolonging its lifespan. A sealant creates a barrier against moisture, UV rays, and abrasion, preventing the paint from fading, cracking, or peeling. Selecting the right sealant and applying it properly is essential for achieving optimal results.
Sealant Selection: Choose a clear, outdoor-rated sealant that is compatible with the chosen paint. Water-based sealants are generally preferred for acrylic paints, while oil-based sealants may be used for latex paints. Consider sealants that offer UV protection to prevent fading. Look for sealants specifically designed for fabric or exterior use. Before applying the sealant to the entire rug, test it on a small, inconspicuous area to ensure it does not alter the color or texture of the paint. Check the manufacturer's instructions for application and drying times.
Applying the Sealant: Apply the sealant evenly, using a brush, roller, or spray applicator. Follow the manufacturer's instructions for the number of coats to apply. Allow each coat of sealant to dry completely before applying the next. Avoid applying too much sealant at once, as this can cause drips or pooling. Ensure that the sealant coats the entire painted surface, including the edges and corners. Consider applying multiple thin coats of sealant, rather than one thick coat, to achieve a more even and durable finish. Work in a well-ventilated area to minimize exposure to sealant fumes.
Curing Time: Allow the sealant to cure completely before placing the rug outdoors. Curing times vary depending on the type of sealant and the environmental conditions. Check the manufacturer's instructions for the recommended curing time. Avoid placing furniture or walking on the rug during the curing process. A longer curing time will result in a more durable and long-lasting finish.
Maintaining the Painted Outdoor Rug
Proper maintenance is essential for preserving the appearance and extending the lifespan of a painted outdoor rug. Regular cleaning and protection from the elements will help to prevent fading, cracking, and peeling. Implementing a few simple maintenance practices can ensure that the rug remains a beautiful and functional addition to the outdoor space for years to come.
Regular Cleaning: Clean the rug regularly to remove dirt, dust, and debris. Use a vacuum cleaner or a broom to sweep away loose particles. For more stubborn stains, spot clean with mild soap and water. Avoid using harsh chemicals or abrasive cleaners, as these can damage the paint and sealant. Pressure washing is generally not recommended, as it can damage the rug fibers. Rinse the rug thoroughly with clean water and allow it to dry completely before placing it back in its original location.
Protecting from the Elements: Protecting the rug from prolonged exposure to direct sunlight and harsh weather conditions will help to prevent fading and damage. Consider placing the rug in a covered area, such as a porch or patio. During periods of heavy rain or snow, consider storing the rug indoors to prevent moisture damage. Use a rug pad underneath the rug to protect it from abrasion and to prevent it from slipping. Regularly inspect the rug for signs of wear and tear, such as fading, cracking, or peeling. Address any issues promptly to prevent further damage and prolong the rug's lifespan.
Storage: When not in use, store the rug in a clean, dry place. Roll the rug tightly and secure it with twine or straps. Avoid folding the rug, as this can cause creases that are difficult to remove. Store the rug in a well-ventilated area to prevent mold and mildew growth. Consider using a rug storage bag to protect the rug from dust and pests.

Outdoor Rug On The An Easy Diy Project

Outdoor Rug With Painted Stripes Addicted 2 Decorating

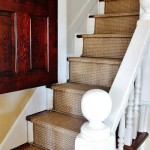
How To Paint An Outdoor Area Rug

Easy Diy Initial Outdoor Rug Front Porch Freshen Up Less Than Perfect Life Of Bliss

Painted Diy Outdoor Rug Tutorial The Heathered Nest

Stenciled Outdoor Rug East Coast Creative

Diy Stenciled Outdoor Rug Everyday Dishes

Diy Outdoor Rug For Less Than 25 Perfect Life Of Bliss

Outdoor Rug On The An Easy Diy Project

Diy Painted Outdoor Rug 1905 Farmhouse
Related Posts