DIY Outdoor Shower Drainage: A Comprehensive Guide
An outdoor shower provides a refreshing and convenient way to rinse off after activities like swimming, gardening, or simply enjoying the outdoors. However, without proper drainage, an outdoor shower can quickly become a source of standing water, mud, and potential property damage. Installing an effective drainage system is crucial for maintaining a clean, safe, and functional outdoor shower area. This article provides a comprehensive guide to DIY outdoor shower drainage, covering key considerations, methods, and best practices to ensure efficient water removal.
Understanding the Importance of Outdoor Shower Drainage
The primary purpose of outdoor shower drainage is to prevent water from accumulating near the shower area. Standing water can lead to several problems, including slippery surfaces, mosquito breeding grounds, and damage to surrounding landscaping or building foundations. It can also create an unsightly and unsanitary environment. Effective drainage disperses water away from the shower area, allowing it to safely infiltrate the ground or be directed to a designated discharge point. This helps maintain a clean and aesthetically pleasing outdoor space and protects against potential water damage.
Before embarking on a DIY drainage project, it's essential to understand local regulations and building codes. Some municipalities may have specific requirements for wastewater disposal, particularly if the shower uses soap and shampoo. These regulations may dictate the type of drainage system allowed and require permits for installation. Ignoring these regulations can result in fines or the need to redo the drainage system, so it's important to research and comply with local requirements before starting any work.
The type of soil where the shower is located significantly impacts drainage design. Sandy soil is generally more permeable and allows water to drain quickly, while clay soil retains water and requires more extensive drainage solutions. A percolation test can help determine the soil's drainage capacity. This test involves digging a hole and observing how quickly water drains from it. The results of the percolation test will inform the selection of the appropriate drainage method and the size of the drainage field needed.
Choosing the Right Drainage Method
Several drainage methods are suitable for outdoor showers, each with its own advantages and disadvantages. The best option depends on factors such as the soil type, the volume of water used, and local regulations. Commonly used methods include gravel pits, dry wells, French drains, and connection to a sewer or septic system.
A gravel pit is a simple and cost-effective drainage solution, particularly suitable for areas with well-draining soil. It involves digging a pit and filling it with gravel or crushed stone. The shower water drains into the pit, and the gravel allows it to slowly percolate into the surrounding soil. The size of the pit depends on the amount of water expected to be discharged. For smaller showers with light usage, a relatively small pit may suffice. However, for larger showers or areas with less permeable soil, a larger pit is necessary to accommodate the water volume. Gravel pits are easy to construct and maintain, but they are not suitable for areas with poor soil drainage or where groundwater contamination is a concern.
A dry well is a larger version of a gravel pit, typically constructed with a perforated plastic or concrete container buried underground. The container provides a larger void space for water storage, allowing for slower infiltration into the surrounding soil. Dry wells are effective in areas with moderate soil drainage, but they can become clogged over time with sediment and debris. Regular maintenance, such as cleaning out the well, is necessary to ensure its continued functionality. Similar to gravel pits, dry wells are not recommended for areas prone to groundwater contamination.
A French drain consists of a perforated pipe buried in a trench filled with gravel. The trench is sloped to allow water to flow away from the shower area to a designated discharge point. French drains are effective in directing water away from the shower and preventing water from pooling. They are particularly useful in areas with poor soil drainage or where there is a need to redirect water to a specific location, such as a garden or a storm drain. The depth and width of the trench, as well as the diameter of the pipe, depend on the volume of water to be drained and the slope of the ground. The trench should be lined with landscape fabric to prevent soil from clogging the gravel and pipe. The perforated pipe should be covered with gravel and then topped with soil.
Connecting the shower drain to a sewer or septic system is the most reliable drainage solution, but it is also the most complex and expensive. This option requires obtaining the necessary permits and following strict plumbing codes. It's typically only feasible if the shower is located close to an existing sewer or septic line. This method ensures that the shower water is treated and disposed of properly, preventing potential environmental contamination. However, it is important to consider the capacity of the existing system and ensure that it can handle the additional wastewater load from the shower. In some cases, a separate septic system may be required specifically for the outdoor shower.
Step-by-Step Guide to Installing a Gravel Pit Drainage System
For this example, we will outline the installation of a gravel pit drainage system. This is a relatively simple and cost-effective option suitable for areas with reasonably well-draining soil.
Step 1: Planning and Preparation.
Before starting any excavation, mark out the area for the gravel pit. The size of the pit will depend on the expected water volume and the soil's drainage capacity. A general guideline is to make the pit at least 3 feet wide, 3 feet long, and 3 feet deep. Call your local utility company to locate any underground utilities before digging. Gather the necessary materials, including a shovel, pickaxe (if needed for hard soil), gravel or crushed stone, landscape fabric, and a level.Step 2: Excavation.
Dig the pit to the desired dimensions. Ensure the sides of the pit are stable to prevent collapse. If the soil is loose or sandy, consider using shoring to support the sides of the pit. Remove any rocks, roots, or debris from the pit. Grade the bottom of the pit so it is level.Step 3: Lining the Pit.
Line the pit with landscape fabric. This will prevent soil from mixing with the gravel and clogging the drainage system. Extend the fabric beyond the edges of the pit to prevent soil from washing into the pit during heavy rains.Step 4: Filling the Pit.
Fill the pit with gravel or crushed stone to within a few inches of the surface. Use a coarse grade of gravel for the bottom layer to promote good drainage, and a finer grade of gravel for the top layer to prevent soil from washing into the pit. Compact the gravel to ensure it is stable.Step 5: Connecting the Shower Drain.
Connect the shower drain to the gravel pit. This can be done using a PVC pipe or a flexible drainage hose. Ensure the pipe or hose is securely connected to the shower drain and extends into the gravel pit. Securely anchor the starting point of the drainage pipe from the shower structure. Make sure the pipe has a slight downward slope to promote gravity flow toward the pit.Step 6: Covering the Pit.
Cover the top of the gravel with the remaining landscape fabric. Overlap the edges of the fabric to ensure complete coverage. Backfill the remaining space with soil. Plant grass or other vegetation on top of the pit to blend it with the surrounding landscape. Be sure to choose plants that can tolerate occasional wet conditions.Maintaining Your Outdoor Shower Drainage System
Regular maintenance is essential to ensure the long-term functionality of your outdoor shower drainage system. The specific maintenance requirements will depend on the type of drainage system you have installed. However, some general maintenance tasks apply to most drainage systems.
Regularly inspect the shower drain and the drainage area for any signs of clogs or blockages. Remove any debris, such as leaves, twigs, or hair, that may be obstructing the flow of water. A simple drain strainer can help prevent debris from entering the drainage system. Check for any signs of erosion or damage to the drainage field. Repair any damaged areas immediately to prevent further degradation. The grate on top of the shower drain should be cleaned regularly to remove any hair, soap residue, or other debris that could clog the drainpipe. A stiff brush and garden hose can be used to effectively clean the grate.
Periodically flush the drainage system with water to remove any accumulated sediment or debris. For gravel pits or dry wells, this can be done by simply running the shower for an extended period. For French drains, a garden hose can be inserted into the perforated pipe to flush out any sediment. If you notice standing water in the drainage area, it may indicate a clog or blockage. Investigate the cause of the blockage and remove it promptly. This may involve using a plumbing snake to clear the drainpipe or excavating the drainage field to remove accumulated sediment.
If your outdoor shower drainage system is connected to a septic system, it is important to follow the septic system's maintenance schedule. This may involve regular inspections and pumping of the septic tank. Avoid using harsh chemicals or excessive amounts of soap in the shower, as these can disrupt the septic system's biological processes.
By following these guidelines, you can ensure that your outdoor shower drainage system functions properly and protects your property from water damage. Proper drainage not only enhances the functionality of your outdoor shower but also contributes to a more enjoyable and sustainable outdoor living space.

Diy Outdoor Shower For Knuckleheads

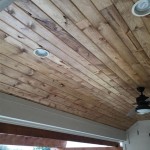
Outdoor Shower Floor Quality Cedar Decking Panel

Diy Outdoor Shower For Knuckleheads

Diy Outdoor Shower For Knuckleheads

Diy Outdoor Shower For Knuckleheads

Options For Drainage Your Outdoor Shower Cape Cod Kits

How To Build An Outdoor Shower With S Wikihow

21 Things To Know Abot Outdoor Shower Drainage Before Installing Home Decorating Ideas Baths Bathrooms

32 Beautiful Easy Diy Outdoor Shower Ideas A Piece Of Rainbow Kits Enclosure

Creating An Outdoor Shower Finegardening
Related Posts