Building An Outdoor Shower Pan: A Comprehensive Guide
An outdoor shower provides a refreshing experience, especially after activities like swimming, gardening, or beach outings. A crucial component of any outdoor shower setup is the shower pan. It serves to collect water, direct it to a drain, and prevent soil erosion or water damage to surrounding structures. Constructing a durable and properly sloped shower pan is essential for the longevity and functionality of the entire outdoor shower system. This article provides a step-by-step guide on how to build an outdoor shower pan, ensuring a waterproof and aesthetically pleasing addition to your outdoor space.
Before beginning the construction process, careful planning and material selection are necessary. Consider the location of the shower, the available space, and the desired aesthetics. The shower pan’s dimensions should be adequate for comfortable movement and prevent splashing outside the designated area. Local building codes and regulations regarding drainage and water management must be consulted to ensure compliance. Proper drainage is particularly vital to prevent standing water and potential mosquito breeding grounds.
Choosing the right materials is paramount for a long-lasting shower pan. Concrete is a popular choice due to its durability and ability to be shaped and molded. However, it requires reinforcement and proper sealing to prevent cracking and water penetration. Alternatives include pre-fabricated shower pans made of acrylic or fiberglass. While easier to install, these may not offer the same level of customization as a concrete pan. Regardless of the chosen material, a waterproof membrane is crucial to prevent water from seeping into the substrate and causing damage.
Key Considerations Before Construction
Several factors should be carefully considered before commencing the actual physical work of building the outdoor shower pan. Neglecting these preliminary steps can lead to significant problems later on. These considerations involve site preparation, drainage planning, and materials acquisition.
Site Preparation: The area where the shower pan will be located must be properly prepared. This involves clearing any vegetation, debris, or existing structures. The soil should be compacted and leveled to provide a stable base for the shower pan. If the soil is unstable or prone to shifting, consider adding a layer of compacted gravel or crushed stone for added support. The dimensions of the intended shower pan should be clearly marked to ensure accurate construction. This marking should account for any surrounding structures or landscaping features.
Drainage Planning: Adequate drainage is crucial to prevent water from accumulating around the shower area. Determine the location of the drain and ensure that it is connected to a suitable drainage system, such as a sewer line, septic tank, or dry well. The shower pan must be sloped towards the drain to facilitate water flow. A slope of approximately ¼ inch per foot is generally recommended. The drainage system should be able to handle the anticipated water volume to prevent overflows. Consider the possibility of freezing temperatures in colder climates. Proper insulation and drainage are crucial to prevent pipes from bursting.
Materials Acquisition: Gather all the necessary materials and tools before starting the construction process. This includes concrete mix (if using concrete), reinforcement materials (such as wire mesh or rebar), waterproofing membrane, drainage fittings, and tools like shovels, trowels, levels, and measuring tapes. Ensure that all materials are of high quality and suitable for outdoor use. Purchasing all the necessary materials in advance will help streamline the construction process and minimize delays.
Step-by-Step Guide to Building a Concrete Shower Pan
Creating a concrete shower pan is a more labor-intensive process compared to using a pre-fabricated pan, but offers enhanced durability and customizability. The following steps outline the process of constructing a concrete shower pan:
Step 1: Building the Form: Create a wooden form to define the shape and size of the shower pan. Use pressure-treated lumber to resist moisture and decay. The form should be slightly larger than the desired finished dimensions to allow for the thickness of the concrete. Ensure that the form is level and securely fastened to prevent it from shifting during the concrete pouring process. The height of the form should be sufficient to accommodate the desired thickness of the concrete slab and the slope towards the drain.
Step 2: Preparing the Base: Inside the form, compact the soil and add a layer of gravel or crushed stone for drainage and stability. This layer should be at least 4 inches thick and compacted thoroughly. Spread a layer of sand over the gravel to create a smooth surface for the concrete. This sand layer will also help prevent the concrete from directly contacting the gravel, which could lead to cracking.
Step 3: Installing the Drain: Position the drain fitting in the center of the form, ensuring that it is properly connected to the drainage system. The drain should be slightly lower than the surrounding surface to facilitate water flow. Use a level to verify that the drain is properly aligned and that the slope towards the drain is consistent. Secure the drain fitting in place to prevent it from moving during the concrete pouring process.
Step 4: Adding Reinforcement: Place wire mesh or rebar inside the form to reinforce the concrete and prevent cracking. The reinforcement should be positioned approximately midway through the concrete slab. Overlap the edges of the wire mesh or rebar to ensure continuous support. This reinforcement is crucial for the durability and longevity of the shower pan.
Step 5: Pouring the Concrete: Mix the concrete according to the manufacturer's instructions. Pour the concrete into the form, ensuring that it fills all the corners and crevices. Use a trowel to smooth the surface of the concrete and create the desired slope towards the drain. The concrete should be evenly distributed and compacted to eliminate air pockets. Avoid pouring concrete in extreme temperatures, as this can affect the curing process.
Step 6: Curing the Concrete: Allow the concrete to cure for at least 7 days, keeping it moist to prevent cracking. Cover the concrete with plastic sheeting or burlap to retain moisture. Regularly dampen the concrete with water to promote proper hydration and strength development. The curing process is critical for the concrete to achieve its full strength and durability.
Step 7: Applying the Waterproofing Membrane: Once the concrete has fully cured, apply a waterproofing membrane to the surface. This membrane will prevent water from seeping into the concrete and causing damage. Choose a waterproofing membrane that is specifically designed for use in wet environments. Follow the manufacturer's instructions for application, ensuring that the membrane covers the entire surface of the shower pan. The waterproofing membrane is a critical component for protecting the shower pan from water damage.
Installing a Pre-Fabricated Shower Pan
While concrete shower pans offer customization, pre-fabricated shower pans provide a simpler and faster installation option. These pans are typically made of acrylic or fiberglass and come in various sizes and shapes. The following steps outline the process of installing a pre-fabricated shower pan:
Step 1: Preparing the Subfloor: Ensure that the subfloor is level and structurally sound. Any unevenness or weaknesses in the subfloor must be addressed before installing the shower pan. Use shims to level the subfloor if necessary. The subfloor must be clean and free of debris to ensure proper adhesion of the shower pan.
Step 2: Positioning the Shower Pan: Carefully position the shower pan on the subfloor, aligning the drain with the existing drainage system. Ensure that the shower pan is level and that the drain is properly connected. Use a level to verify that the shower pan is properly aligned and that the slope towards the drain is consistent. Avoid placing excessive weight on the shower pan during installation to prevent damage.
Step 3: Securing the Shower Pan: Secure the shower pan to the subfloor using construction adhesive or screws, following the manufacturer's instructions. Ensure that the shower pan is firmly attached to the subfloor to prevent it from moving or shifting. The adhesive should be applied evenly to ensure a strong bond. The screws should be driven into the subfloor at regular intervals to provide additional support.
Step 4: Connecting the Drain: Connect the drain fitting to the shower pan, ensuring a watertight seal. Use plumber's putty or Teflon tape to prevent leaks. The drain connection should be properly tightened to ensure that it does not come loose over time. Test the drain connection for leaks before completing the installation.
Step 5: Sealing the Edges: Seal the edges of the shower pan where it meets the surrounding walls or floor using caulk. Choose a caulk that is specifically designed for use in wet environments. The caulk should be applied evenly and smoothly to create a watertight seal. Regularly inspect the caulk for cracks or damage and reapply as needed.
Building an outdoor shower pan requires meticulous planning, careful execution, and the use of appropriate materials. Whether opting for a custom concrete pan or a pre-fabricated option, adhering to these guidelines will ensure a properly functioning, durable, and aesthetically pleasing outdoor shower experience.

32 Beautiful Easy Diy Outdoor Shower Ideas A Piece Of Rainbow

Diy Outdoor Shower Florida Blog Fresh Mommy

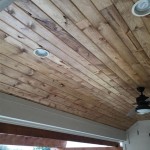
Outdoor Shower Floor Quality Cedar Decking Panel

Diy Outdoor Shower For Knuckleheads

Diy Outdoor Shower For Knuckleheads

How To Build An Outdoor Shower With S Wikihow

How To Build An Outdoor Shower Part 1 Diy Framing

Diy Outdoor Shower For Knuckleheads

Outdoor Shower Plans Cedar Outdor Floor With Beach Pebbles

How To Build An Outdoor Shower With S Wikihow
Related Posts