Building an Outdoor Shower Drain: A Comprehensive Guide
An outdoor shower can be a luxurious addition to a home, offering a convenient way to rinse off after gardening, swimming, or various outdoor activities. A critical, and often overlooked, component of an outdoor shower is the drain. A properly installed drain prevents water from pooling, mitigates erosion, and protects surrounding vegetation. Building an effective outdoor shower drain involves careful planning, understanding local regulations, and selecting appropriate materials. This article explores the essential aspects of designing and constructing an outdoor shower drain system.
Planning and Permitting
Before commencing any construction, thorough planning is crucial. The initial step involves assessing the location for the outdoor shower. Consider the proximity to existing plumbing lines, the type of soil, and the area's drainage characteristics. Areas with poor drainage, such as clay-heavy soils, require more elaborate drainage solutions compared to well-draining sandy soils. The intended usage frequency of the shower will also influence the drainage system's requirements. A shower used only occasionally will necessitate a less complex system than one used daily.
Perhaps the most vital part of the planning phase is checking local building codes and regulations. Many municipalities have specific requirements regarding wastewater disposal. Directly discharging shower wastewater into the ground may be prohibited due to potential contamination of groundwater sources. Contacting the local building department or environmental agency is essential to determine the permissible drainage options. These options may include connecting to the existing sewer system, installing a septic system leach field, or utilizing a dry well system.
Failing to obtain the necessary permits can lead to fines, legal issues, and the requirement to dismantle the improperly built drain system. Permit applications typically require detailed plans of the proposed drainage system, including the materials used, the dimensions of the drain field, and the distance from property lines and water sources. Accurate and complete documentation will streamline the permitting process and ensure compliance with local regulations.
During the planning stage, consider the aesthetics of the drain. While functionality is paramount, the drain shouldn't be an eyesore. Options include using decorative grates or integrating the drain seamlessly into the surrounding landscape. Careful consideration of aesthetics will ensure the outdoor shower area complements the overall design of the property.
Drainage System Options
Several options exist for draining an outdoor shower, each with its own advantages and disadvantages. The selection of the appropriate system depends on factors such as local regulations, budget, soil type, and the volume of wastewater generated. Understanding the characteristics of each system is vital for making an informed decision.
Connection to the Sewer System: This is often the most straightforward and environmentally sound option, provided it's permitted and economically feasible. This entails connecting the shower drain directly to the home's existing sewer line. It ensures that wastewater is treated at a municipal wastewater treatment plant, minimizing the risk of environmental contamination. However, connecting to the sewer line may require professional plumbing work and could involve significant excavation, particularly if the shower is located far from the existing sewer connection. Slope is critical for this system, ensuring wastewater flows efficiently to the sewer line. A properly graded pipe with sufficient fall will prevent backups and clogs.
Septic System and Leach Field: If the property already has a septic system, it may be possible to connect the outdoor shower drain to the existing system. This option requires careful consideration of the septic system's capacity. Adding the shower's wastewater load to an already strained septic system can lead to system failure. A septic system professional should evaluate the existing system to determine if it can handle the additional load. Construction of a new leach field dedicated to the shower waste is also a possibility. This option requires significant space and regulatory approval.
Dry Well System: A dry well is an underground structure that collects and infiltrates water into the surrounding soil. This system is suitable for locations with well-draining soil and where direct discharge of wastewater is permitted. The dry well typically consists of a large, perforated container or pit filled with gravel or other aggregate materials. The shower drain is connected to the dry well, allowing the water to slowly percolate into the ground. The size of the dry well depends on the volume of water it needs to handle. Proper construction involves ensuring the dry well is located away from foundations and water sources to prevent water damage or contamination. A filter fabric should be placed around the gravel to prevent soil from clogging the system.
Gravel Pit or French Drain: Similar to a dry well, a gravel pit or French drain is a simpler and less expensive option suitable for areas with excellent drainage. It involves excavating a shallow trench or pit and filling it with gravel. The shower drain empties into the gravel, allowing the water to dissipate into the surrounding soil. This system is less effective than a dry well for handling larger volumes of water and is more prone to clogging over time. The gravel pit should be located in an area with good drainage and away from areas where pooling water could become a nuisance.
Construction and Material Selection
After selecting a drainage system and obtaining the necessary permits, the construction phase can begin. Choosing the right materials is crucial for ensuring the drain's longevity and functionality. The specific materials needed will vary depending on the chosen drainage system, but some common components include piping, drainage grates, gravel, and filter fabric.
Piping: PVC (polyvinyl chloride) pipe is a common choice for drain lines due to its durability, affordability, and ease of installation. PVC pipe is resistant to corrosion and can withstand a wide range of temperatures. Ensure to use the appropriate schedule (thickness) of PVC pipe for underground applications. Schedule 40 PVC is generally sufficient for most residential drainage systems. Properly prime and glue all pipe fittings to ensure a watertight seal. A slight slope, typically ¼ inch per foot, should be maintained along the drain line to facilitate proper water flow.
Drainage Grates: The drainage grate is the visible component of the drain system and should be selected based on both functionality and aesthetics. Grates are available in various materials, including plastic, metal, and composite materials. Metal grates, such as those made from stainless steel or cast iron, are more durable but can be more expensive. Plastic grates are more affordable but may not be as durable. Composite grates offer a balance of durability and affordability. The grate should have sufficient open area to allow water to drain quickly and prevent pooling. It should also be securely attached to the drainpipe to prevent it from being dislodged.
Gravel and Aggregate: Gravel is a key component of dry wells, gravel pits, and French drains. It provides a porous medium for water to percolate into the surrounding soil. Use clean, washed gravel to prevent silt and debris from clogging the system. The size of the gravel should be appropriate for the application. Larger gravel promotes better drainage but can also create larger voids, potentially allowing soil to infiltrate the system. A mix of gravel sizes can provide a good balance of drainage and filtration.
Filter Fabric: Filter fabric, also known as landscape fabric, is used to prevent soil from clogging the drainage system. It is typically placed around the gravel in dry wells and French drains. The fabric allows water to pass through while preventing soil particles from entering and reducing the system's effectiveness. Choose a high-quality filter fabric that is specifically designed for drainage applications. Avoid using woven fabrics, as they can become clogged more easily. Overlap the fabric seams to ensure complete coverage and prevent soil infiltration.
Construction Steps: The construction process varies depending on the chosen drainage system. However, some common steps include excavating the site, installing the drainpipe, constructing the drainage structure (dry well, gravel pit, etc.), backfilling with gravel, and installing the drainage grate. During excavation, be mindful of underground utilities. Contacting the local utility companies before digging is crucial to avoid damaging buried cables or pipes. Ensure the excavation is properly sloped to facilitate drainage towards the drainpipe. When backfilling with gravel, compact the gravel layers to prevent settling. Install the drainage grate flush with the surrounding surface to prevent tripping hazards.
Maintaining the System: Once installed, regular maintenance will help the drainage system function effectively for years. This includes clearing debris from the grate and periodically inspecting the drain for clogs or damage. Debris, such as leaves, twigs, and dirt, can accumulate on the grate and obstruct water flow. Regularly removing this debris will prevent water from pooling and ensure the drain functions efficiently. If the drain becomes clogged, it may be necessary to flush the drainpipe with water or use a drain snake to remove the blockage.

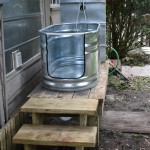
Diy Outdoor Shower For Knuckleheads

Diy Outdoor Shower For Knuckleheads

How To Build An Outdoor Shower With S Wikihow

Options For Drainage Your Outdoor Shower Cape Cod Kits

How To Build An Outdoor Shower Concord Carpenter

Options For Drainage Your Outdoor Shower Cape Cod Kits

Diy Outdoor Shower For Knuckleheads

Creating An Outdoor Shower Finegardening

Options For Drainage Your Outdoor Shower Cape Cod Kits

21 Things To Know Abot Outdoor Shower Drainage Before Installing Home Decorating Ideas Baths Bathrooms