Framing an Outdoor Kitchen with Wood Studs: A Comprehensive Guide
An outdoor kitchen is an excellent way to extend your living space and enjoy the outdoors. However, framing an outdoor kitchen is not as simple as framing a traditional indoor kitchen. There are several additional factors to consider, such as the weather and the weight of the appliances.
In this article, we will provide you with a comprehensive guide on how to frame an outdoor kitchen with wood studs. We will cover everything from choosing the right materials to installing the sheathing and trim.
Choosing the Right Materials
The first step in framing an outdoor kitchen is choosing the right materials. The most important factor to consider is the weather. The materials you choose must be able to withstand the elements, including rain, snow, and wind.
For the framing, we recommend using pressure-treated lumber. Pressure-treated lumber is treated with chemicals that make it resistant to rot and decay. It is the best choice for outdoor projects because it will last for many years.
For the sheathing, we recommend using plywood. Plywood is a strong and durable material that will protect the framing from the elements. It is also easy to cut and install.
For the trim, we recommend using cedar or redwood. Cedar and redwood are naturally resistant to rot and decay. They are also beautiful woods that will add a touch of elegance to your outdoor kitchen.
Installing the Framing
Once you have chosen your materials, you can begin installing the framing. The first step is to lay out the perimeter of your outdoor kitchen. Use stakes and string to mark the corners and the location of the walls.
Next, you need to install the footings. Footings are concrete supports that will help to support the weight of the kitchen. Dig holes for the footings and pour the concrete. Allow the concrete to cure for at least 24 hours before continuing.
Once the footings are installed, you can begin framing the walls. Start by installing the bottom plates. The bottom plates are the horizontal pieces of lumber that will form the base of the walls.
Next, you need to install the studs. Studs are the vertical pieces of lumber that will form the walls. Space the studs 16 inches apart on center.
Once the studs are installed, you can install the top plates. The top plates are the horizontal pieces of lumber that will form the top of the walls.
Installing the Sheathing
Once the framing is installed, you can begin installing the sheathing. Sheathing is the material that will cover the framing and protect it from the elements.
Start by cutting the sheathing to size. Then, nail the sheathing to the studs. Use 8d nails and space the nails 6 inches apart on center.
Installing the Trim
Once the sheathing is installed, you can begin installing the trim. Trim is the material that will cover the edges of the sheathing and give the kitchen a finished look.
Start by cutting the trim to size. Then, nail the trim to the sheathing. Use 6d nails and space the nails 4 inches apart on center.
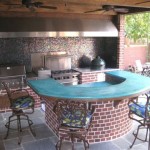
Once the trim is installed, your outdoor kitchen is complete. Enjoy cooking and entertaining in your new outdoor space!

Outdoor Kitchen Framing 11 Helpful Facts You Should Know

Outdoor Kitchen Construction Build An Landscaping Network

Diy Outdoor Kitchen Build Part 1 Framing And Layout Vevor 614

Outdoor Kitchen Construction Build An Landscaping Network

Why Choose Sumo Frames Outdoor

Outdoor Kitchen Rogue Engineer

How To Build A Bbq Island With Steel Studs Outdoor Kitchen Modular Kitchens Plans

Framing Your Outdoor Kitchen Increte Of Houston

How To Build An Outdoor Kitchen The Home Depot

Rolling Outdoor Island Building Plans Pneumatic Addict
Related Posts