Building a DIY Wood Outdoor Patio Table
A well-crafted outdoor patio table can transform any backyard into a welcoming gathering space. The beauty of a DIY project is that you have complete control over the design, dimensions, and materials to create a table perfectly suited to your needs and style. This guide will equip you with the knowledge and steps required to build your own sturdy and stylish wood patio table.
1. Planning and Design
Before diving into construction, careful planning is essential. The initial phase involves outlining your vision and making informed decisions about the table's design and dimensions.
Consider the following factors:
- Size: Determine the number of guests you intend to seat comfortably. A standard dining table size typically accommodates four to six people. Adjust the dimensions based on your desired capacity.
- Shape: Choose from a variety of shapes such as rectangular, square, or round. Rectangular tables are generally practical for larger gatherings, while round tables create a more intimate setting.
- Style: Decide on the aesthetic you envision for your patio table. A rustic style might involve using reclaimed wood, while a modern design could call for sleek lines and clean finishes.
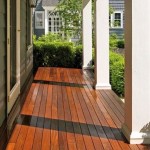
- Materials: Select durable and weather-resistant wood species suitable for outdoor use. Teak, cedar, redwood, and pressure-treated pine are popular choices.
- Budget: Set a realistic budget for materials, tools, and any potential finishing touches.
Once you have a clear concept, create a detailed sketch or drawing of your planned table. This will serve as a visual guide throughout the construction process.
2. Gathering Materials and Tools
Having all the necessary materials and tools readily available will ensure a smooth and efficient building experience. This section provides a comprehensive list of essential items.
Materials:
- Wood: You will need lumber for the tabletop, legs, rails, and any supporting structures. Determine the thickness and dimensions based on your design and desired stability.
- Fasteners: Use high-quality screws or bolts to securely fasten the table components. Choose stainless steel or galvanized options for increased weather resistance.
- Wood Glue: Apply wood glue to joints for added strength and stability.
- Finish: Select a sealant or paint designed for outdoor use to protect the wood from moisture and the elements.
Tools:
- Circular Saw or Table Saw: Used for cutting lumber to size.
- Power Drill: For drilling pilot holes and driving screws.
- Screwdriver: For manual driving of screws.
- Measuring Tape: Essential for accurate dimensioning and cutting.
- Level: For ensuring that the tabletop and legs are level and stable.
- Clamps: Used to hold pieces together during assembly.
- Safety Glasses and Gloves: Protect your eyes and hands during the construction process.
3. Construction Steps
With your materials and tools assembled, you are ready to embark on the construction process. Follow these detailed steps to bring your patio table design to life.
Building the Tabletop:
- Cut the top boards to size: Using your saw, accurately cut the wood planks to the desired length and width for the tabletop.
- Join the top boards: Using wood glue and screws or bolts, join the planks together to form a solid tabletop. Ensure that the edges are flush and aligned.
- Sand the tabletop: Once the glue is dry, sand the tabletop smooth to remove any rough edges or imperfections.
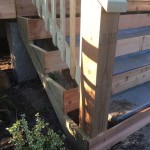
Building the Legs:
- Cut the legs to size: Cut the legs to the desired height and width, keeping in mind that these will be joined to the tabletop.
- Cut the rails: These will connect the legs to create a sturdy frame for the table. Cut the rails to length based on the dimensions of your tabletop.
- Attach the rails to the legs: Use wood glue and screws or bolts to securely attach the rails to the legs. Ensure that the corners are square and the rails are aligned.
Assembling the Table:
- Attach the legs to the tabletop: Position the leg assembly under the tabletop and use screws or bolts to attach the legs to the underside of the tabletop. Use a level to ensure the legs are plumb and the tabletop is level.
- Reinforce the frame: Consider adding additional bracing to the table frame for improved stability, especially for larger tables.
Finishing Touches:
- Sand and finish: Sand the entire table surface to prepare it for a final finish. Apply a weather-resistant sealant or paint to protect the wood and enhance its appearance.
After the finish has dried, your DIY wood patio table is ready to be enjoyed.

Diy Outdoor Table Angela Marie Made

Outdoor Dining Table Kreg Tool

Diy Outdoor Dining Table Restoration Hardware Dupe Thrifty Pineapple
:max_bytes(150000):strip_icc()/cherishedbliss-2fe16e06a68b44589c6631e6b39ae68f.jpg?strip=all "18 Diy Outdoor Table Plans")
18 Diy Outdoor Table Plans

Diy Outdoor Patio Table Tutorial Decor And The Dog

Rachel Schultz How To Build A 75 Outdoor Dining Table

Diy Patio Table With Built In Ice Box Drink Coolers Matching Benches Woodworking Plan Remodelaholic

How To Diy An Outdoor Farmhouse Patio Table

25 Diy Patio Table Plans Free Wood Outdoor
:max_bytes(150000):strip_icc()/remodelaholic-b957b7f134eb4281be2bcb3dee084626.jpg?strip=all "18 Diy Outdoor Table Plans")
18 Diy Outdoor Table Plans
Related Posts