How to Craft an Easy Outdoor Dining Table for Summer Gatherings
Summer is a season for outdoor living, and what better way to enjoy the warm weather than by dining al fresco? An outdoor dining table provides a comfortable and inviting space to gather with friends and family for meals, drinks, and conversation. If you're looking for a way to upgrade your outdoor space, building an outdoor dining table is a great option that combines functionality with style.
The key to building an easy outdoor dining table is to use simple materials and techniques. Inexpensive materials like treated lumber, which is resistant to rot and decay, will help save money without sacrificing durability. Additionally, using basic joinery techniques will ensure a sturdy table that will last for years to come.
To get started, you'll need to gather a few materials:
- 4 lengths of treated lumber (8 feet long by 6 inches wide by 2 inches thick) for the table legs
- 1 length of treated lumber (8 feet long by 12 inches wide by 2 inches thick) for the table top
- Wood screws
- Drill
- Circular saw
- Clamps
Once you have your materials, follow these steps to build your outdoor dining table:
- Cut the lumber.
Using your circular saw, cut the following pieces:
- Four 30-inch lengths of treated lumber for the table legs
- Two 8-foot lengths of treated lumber for the table top
- One 24-inch length of treated lumber for the table stretcher
- Assemble the table legs. Lay two of the 30-inch pieces of treated lumber parallel to each other, spaced 6 inches apart. Clamp the pieces together and pre-drill two holes at each end. Insert wood screws into the holes to secure the legs. Repeat this step to assemble the other two table legs.
- Attach the table top. Place the two 8-foot lengths of treated lumber side by side to form the table top. Clamp the pieces together and pre-drill holes along the edges. Insert wood screws into the holes to secure the table top.
- Add the table stretcher. Center the 24-inch length of treated lumber between the table legs and clamp it in place. Pre-drill holes and insert wood screws to secure the stretcher.
- Finish the table. To protect the table from the elements, you can apply a stain or sealant. Allow the finish to dry completely before using the table.
Once your outdoor dining table is complete, you can enjoy summer meals and gatherings in comfort and style. The simple design and durable materials will ensure that your table lasts for years to come.

Outdoor Dining Table Building Plans The Creative Mom

Outdoor Dining Table Building Plans The Creative Mom

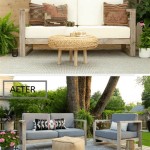
Create An Outdoor Dining Area On A Budget

Building An Outdoor Dining Table Erin Kestenbaum

Easy 10 Person Outdoor Table Rogue Engineer

Outdoor Table With X Leg And Herringbone Top Free Plans

Outdoor Dining Table Plans Houseful Of Handmade

Building An Outdoor Dining Table Erin Kestenbaum

Outdoor Dining Table Kreg Tool

Diy Farmhouse Dining Table Free Plans And Tutorial