DIY Outdoor Storage Bench Plans: A Comprehensive Guide
Outdoor spaces are often limited in storage capacity. Gardening tools, outdoor cushions, and children’s toys can quickly clutter patios, decks, and yards. A DIY outdoor storage bench offers a dual solution, providing comfortable seating while simultaneously concealing items in an easily accessible manner. This article serves as a guide to DIY outdoor storage bench plans, exploring various designs, materials, construction techniques, and considerations for personalization.
The appeal of a DIY approach lies in the ability to tailor the bench to specific needs and preferences. Pre-fabricated storage benches can be costly and may not perfectly fit the available space. By building a bench oneself, individuals can control the dimensions, materials, style, and overall functionality of the structure. This allows for customization options to maximize space utilization and complement existing outdoor décor.
Choosing the Right Design for Your Needs
The initial step in any DIY project is selecting the appropriate design. Several factors influence this decision, including the available space, the intended use of the bench, and the desired aesthetic. Some common storage bench designs include:
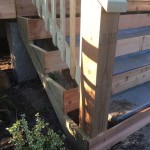
Traditional Bench with Hinged Lid: This is perhaps the most straightforward design. It features a rectangular box with a hinged lid that provides access to the storage compartment. This design is well-suited for storing cushions, blankets, and other large, bulky items.
Bench with Drawers: A bench with drawers offers more organized storage. This design is ideal for smaller items, such as gardening tools, gloves, and outdoor games. The drawers can be built with varying depths and widths to accommodate different storage needs.
Bench with Lift-Up Seats: This design features individual seat sections that lift up to reveal separate storage compartments. This is a practical option for benches that will be used by multiple people, as each user can have their own dedicated storage space.
Corner Bench with Storage: Corner benches are designed to maximize space utilization in corners of patios or decks. These benches typically incorporate a triangular storage compartment beneath the seat.
Backless Bench with Storage: A backless bench offers a minimalist design and can be easily moved around the outdoor space. It is often simpler to construct than benches with a backrest, making it a good option for beginner DIYers.
When selecting a design, consider the proportions of the bench. A bench that is too tall or too short may be uncomfortable to sit on. Generally, a seat height of 17-19 inches is considered ergonomic for most adults. The depth of the seat should be at least 16 inches to provide adequate support.
Furthermore, consider the ease of access to the storage compartment. A hinged lid should be easy to open and close, and drawers should glide smoothly. If the bench will be exposed to the elements, ensure that the lid or drawers are designed to prevent water from entering the storage area.
Material Selection and Preparation
The choice of materials is crucial for the durability and longevity of an outdoor storage bench. The material must be resistant to moisture, rot, and insect infestation. Common materials used for outdoor furniture include:
Pressure-Treated Lumber: Pressure-treated lumber is chemically treated to resist decay and insect damage. It is a cost-effective and readily available option for outdoor projects. However, it is important to choose lumber that is specifically treated for ground contact if the bench will be placed directly on the ground.
Cedar: Cedar is a naturally rot-resistant wood that is also resistant to insects. It has a beautiful reddish-brown color and a pleasant aroma. Cedar is more expensive than pressure-treated lumber but offers superior durability and aesthetic appeal.
Teak: Teak is a dense, oily hardwood that is highly resistant to moisture and decay. It is often used for high-end outdoor furniture. Teak is the most expensive of the three options, but it can last for decades with proper care.
Composite Decking: Composite decking is made from a combination of wood fibers and plastic. It is extremely durable and requires minimal maintenance. Composite decking is resistant to rot, insects, and fading. However, it can be more expensive than natural wood options.
Regardless of the material chosen, it is essential to properly prepare it before construction. This includes sanding the wood to remove any rough edges or splinters. For pressure-treated lumber, it is recommended to allow the wood to dry completely before staining or painting. This will help the stain or paint adhere properly and prevent it from peeling or cracking.
If using screws or nails, choose fasteners that are specifically designed for outdoor use. Stainless steel or galvanized fasteners are resistant to rust and corrosion.
Consider the climate in which the bench will be located when selecting materials. In areas with high humidity, it is especially important to choose a rot-resistant material. In areas with harsh winters, make sure the chosen material can withstand freezing temperatures and snow load.
Construction Techniques and Assembly
The construction of an outdoor storage bench involves several steps, including cutting the lumber to size, assembling the frame, attaching the panels, and installing the lid or drawers. Precision is key to ensure a sturdy and well-fitting bench.
Cutting the Lumber: Use a measuring tape and a saw to cut the lumber to the required dimensions. A miter saw is ideal for making precise cuts, but a circular saw can also be used. Ensure that all cuts are square and accurate.
Assembling the Frame: The frame provides the structural support for the bench. It is typically constructed from 2x4 lumber. Use screws or nails to join the frame pieces together. Ensure that the frame is square and level.
Attaching the Panels: The panels form the sides, front, and back of the bench. They can be made from plywood, cedar planks, or composite decking. Attach the panels to the frame using screws or nails. Ensure that the panels are flush and aligned.
Installing the Lid or Drawers: The lid can be attached to the bench using hinges. Choose hinges that are strong enough to support the weight of the lid. Drawers can be installed using drawer slides. Choose drawer slides that are appropriate for the size and weight of the drawers.
Finishing Touches: Once the bench is assembled, it is time to add the finishing touches. This includes sanding any rough edges, filling any holes with wood filler, and applying a stain or paint. Choose a stain or paint that is specifically designed for outdoor use. This will protect the wood from the elements and enhance its appearance.
When assembling the bench, it is crucial to use appropriate safety equipment, including safety glasses and gloves. Work in a well-ventilated area when using paints, stains, or adhesives.
Consider using wood glue in addition to screws or nails for added strength and durability. Clamp the pieces together while the glue dries to ensure a strong bond.
For benches with hinged lids, consider adding a chain or strap to prevent the lid from opening too far. This can help prevent damage to the hinges and protect the user from being accidentally hit by the lid.
Pay attention to the details, such as the alignment of the panels and the smoothness of the drawer slides. These small details can make a big difference in the overall appearance and functionality of the bench.
Personalization and Customization Options
One of the advantages of building a DIY outdoor storage bench is the ability to personalize it to match your individual style and preferences. There are numerous ways to customize the bench, including:
Adding Decorative Elements: Decorative elements can add visual interest to the bench. Consider adding trim, molding, or decorative hardware. You can also paint the bench in a custom color or add stencils or decals.
Incorporating Cushions and Pillows: Cushions and pillows can make the bench more comfortable to sit on. Choose cushions and pillows that are made from outdoor-friendly fabrics that are resistant to fading and moisture.
Adding a Backrest: A backrest can provide additional support and comfort. The backrest can be made from lumber, metal, or wicker. Consider adding decorative details to the backrest, such as slats or carvings.
Integrating Plant Holders: Integrate plant holders into the design of the bench to add a touch of greenery. Plant holders can be attached to the sides of the bench or built into the seat.
Adding Lighting: Add lighting to the bench to create a warm and inviting ambiance. String lights, lanterns, or solar-powered lights can be used to illuminate the bench.
When personalizing the bench, consider the overall aesthetic of your outdoor space. Choose colors and materials that complement existing furniture and décor.
Experiment with different finishes and textures to create a unique and personalized look. Add reclaimed wood or salvaged materials to give the bench a rustic or vintage feel.
Consider incorporating storage solutions that are tailored to your specific needs. Add dividers or shelves to the storage compartment to organize items.
By incorporating personalization and customization options, you can create an outdoor storage bench that is both functional and stylish.

How To Build An Outdoor Storage Bench Diy Family Handyman

Outdoor Storage Bench Vertical Slat Design Ana White

How To Build A Diy Outdoor Storage Bench

Outdoor Storage Bench Diy Backyard Box With Our Handcrafted Life

Free Plans Build A Modern Outdoor Storage Bench

Modern Outdoor Storage Bench Plans Myoutdoorplans

Easy Diy How To Build A Modern Outdoor Cedar Bench Real

How To Build An Outdoor Storage Bench Diy Family Handyman

Diy Storage Bench Wilker Do S

Diy Outdoor Storage Benches The Garden Glove
Related Posts