Outdoor Gas Fire Pit Instructions: A Comprehensive Guide
Outdoor gas fire pits offer a convenient and aesthetically pleasing way to enhance outdoor living spaces. They provide warmth and ambiance without the mess and hassle of traditional wood-burning fires. Understanding the proper installation, operation, and maintenance procedures is crucial for ensuring safe and enjoyable use. This article provides comprehensive instructions for setting up and using an outdoor gas fire pit.
Key Considerations Before Installation
Prior to initiating the installation process, several critical aspects must be considered to guarantee safety and compliance with local regulations. These considerations encompass location selection, gas supply compatibility, and adherence to safety guidelines.
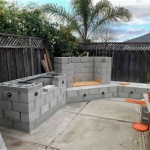
Location Selection: The placement of the fire pit should be carefully considered. A stable, level surface is essential. Avoid placing the fire pit directly on combustible materials like wooden decks or grass. A non-combustible base such as concrete pavers or gravel is recommended. Ensure the location is at least 10 feet away from any structures, overhanging trees, or flammable objects. Consider prevalent wind patterns to minimize the risk of blowing embers or excessive smoke drifting towards occupied areas. Check local ordinances and HOA regulations, as many jurisdictions have specific rules regarding open-flame devices.
Gas Supply Compatibility: Determine the type of gas supply to be used: propane (LP) or natural gas (NG). Most fire pits are designed for use with one type of gas only, so selecting the correct model is imperative. Propane fire pits typically connect to a standard propane tank, while natural gas fire pits require a connection to a natural gas line installed by a qualified professional. Ensure that the gas pressure and BTU requirements of the fire pit match the available gas supply. Improper gas connections can lead to dangerous leaks or inefficient operation.
Safety Guidelines: A carbon monoxide detector should be installed nearby, especially if the fire pit is located near enclosed spaces such as porches or patios with roofs. Keep a fire extinguisher readily accessible in case of emergencies. Never leave a burning fire pit unattended. Supervise children and pets closely to prevent accidents. Educate all users about the proper operation and safety precautions associated with the fire pit.
Step-by-Step Installation Procedures
The installation process involves several key steps, from connecting the gas supply to adding decorative elements. Following these steps carefully will ensure a safe and functional fire pit.
Connecting the Gas Supply (Propane): For propane fire pits, locate the propane tank regulator and connect it to the propane tank. Ensure the connection is tight and secure. Use a wrench to tighten the fitting, but avoid overtightening, which can damage the threads. Attach the gas hose from the regulator to the fire pit’s gas valve. Again, ensure a tight and secure connection. Before proceeding, perform a leak test using a soapy water solution. Brush the solution onto all gas connections. If bubbles appear, there is a leak. Tighten the connections further and retest until no leaks are detected.
Connecting the Gas Supply (Natural Gas): Connecting to a natural gas line is a more complex process that should only be performed by a qualified gas technician or plumber. The technician will need to run a gas line from the main gas supply to the fire pit location. A shut-off valve should be installed near the fire pit to allow for easy gas shut-off in case of emergencies or maintenance. The technician will connect the gas line to the fire pit’s gas valve and perform a leak test. Never attempt to connect a natural gas line without proper training and experience.
Installing the Burner and Media: Once the gas connections are secure and leak-tested, install the burner according to the manufacturer’s instructions. The burner is typically positioned in the center of the fire pit bowl. Ensure the burner is level and properly seated. Add the fire pit media, such as lava rocks, fire glass, or ceramic logs. Distribute the media evenly around the burner, but avoid blocking the burner ports, as this can impede gas flow and create incomplete combustion. The media serves both aesthetic and functional purposes. It helps to distribute the heat evenly and provides a visually appealing flame pattern.
Testing the Fire Pit: After installing the burner and media, perform a final test of the fire pit. Turn on the gas supply at the tank or the shut-off valve. Follow the manufacturer’s instructions for lighting the fire pit. This typically involves pressing and holding the igniter button while simultaneously turning the gas control knob to the “light” position. Once the pilot light is lit, release the igniter button and continue holding the control knob for a few seconds until the pilot light remains lit on its own. Then, turn the control knob to the desired flame height. Observe the flame pattern. The flames should be consistent and evenly distributed across the burner. If the flames are uneven or weak, check for obstructions in the burner ports or gas lines.
Operating and Maintaining the Fire Pit
Proper operation and regular maintenance are essential for ensuring the longevity and safe use of the outdoor gas fire pit.
Operating Procedures: Always follow the manufacturer’s instructions for lighting and extinguishing the fire pit. Before each use, inspect the gas lines and connections for any signs of damage or leaks. Check the burner for any obstructions or debris. Never use the fire pit indoors or in enclosed spaces. Keep flammable materials away from the fire pit while it is in operation. Supervise children and pets closely. Never leave the fire pit unattended. When extinguishing the fire pit, turn the gas control knob to the “off” position and close the gas supply valve at the tank or shut-off valve.
Routine Maintenance: Regularly clean the fire pit bowl and burner to remove any debris, dirt, or soot. Use a brush or vacuum to remove any buildup. Inspect the gas lines and connections for leaks or damage at least once a year. Replace any damaged parts immediately. Periodically check the fire pit media for discoloration or deterioration. Replace the media as needed. Protect the fire pit from the elements when not in use. A fire pit cover can help to prevent rust, corrosion, and other damage caused by rain, snow, and sunlight. Store propane tanks properly in a well-ventilated area away from heat sources and direct sunlight.
Troubleshooting Common Issues: If the fire pit fails to light, check the gas supply to ensure that the tank is full or the gas line is open. Verify that the igniter is functioning properly. Clean the igniter tip with a wire brush if necessary. If the flames are weak or uneven, check for obstructions in the burner ports or gas lines. Ensure that the fire pit media is not blocking the burner ports. If the fire pit emits a strong odor of gas, immediately turn off the gas supply and contact a qualified gas technician to inspect the system.
By adhering to these instructions, users can safely and effectively enjoy the benefits of an outdoor gas fire pit, creating a warm and inviting atmosphere for outdoor gatherings and relaxation. Remember that safety is paramount and consulting with qualified professionals for installation and maintenance is always recommended.

Gas Fire Pit Installation Denver Boulder Fort Collins

7 Outdoor Gas Firepit Safety Tips For Bay Area Homes

What To Look For In Your Outdoor Gas Fire Pit Jetmaster Vic

White Mountain Hearth By Empire Outdoor Linear Gas Fire Pit 48

September Is The Time To Build Your Outdoor Firepit

Gas Fire Pit Kit Propane Natural Cape Cod Pits Ma

Safire Plateau Gas Firepit Gc Fires

Teamson Home Firepit Outdoor Gas Fire Pit Resin With Lava Rock Cover Hf11802aa Com

White Mountain Hearth By Empire Outdoor Linear Gas Fire Pit 48

46 Octagon Custom Stone Gas Fire Pit Firepit Outfitter
Related Posts